Category Archives: Recipes

My Berlin Kitchen: Review and Recipe

My latest review for Bookshelf Bombshells, My Berlin Kitchen, is a delightful tale of how one thoroughly confused, kitchen-mad romantic broke off her engagement, quit her dream job, and went across the ocean in search of happiness. And food. Lots of food.

 Some of you may know author Luisa Weiss from her popular food blog The Wednesday Chef.  Inspired by other excellent food blogs and drowning in stacks of recipes she’d clipped from the Wednesday food section, Weiss set out to test the recipes, just for a year. That year flew by. She gained a dedicated readership following her mix of personal journal and cooking diary (and now reading her “love story with recipes”).

Now according to Luisa, there are two camps of potato salad eaters: mayo (rich and creamy) or hot vinegar (light and sour).  Being a Southern girl, I was raised with both feet firmly planted in the mayo camp. Potato salad should contain big old Idaho potatoes, hard boiled eggs, onions, MAYO, and MUSTARD (but NO relish, please). It should be firm, creamy, and yellow with sprinkles of salt, pepper, and maybe paprika on top.  My mom, despite growing up in Germany, is renowned for her Southern potato salad (based on one of my dad’s family recipes). I stand as firm as a scoop of that divine salad: mayo & mustard rule.

But I’m also totally open to new foods. I had to give it a try.

And I’m delighted I did. Though the hot vinegar mix made my house smell like a German restaurant (tip: open windows before boiling), the finished salad was crisp, vibrant, and not at all overpowering. Everyone in the house liked it. The tart/sour flavor mellowed  over time (it makes a good-sized batch, so we ate it over several days).

Though I don’t think it will replace my family recipe, it was a nice change and would be a hit at any party or potluck. Try it!

Pin It

Kartoffelsalat (Potato Salad)
from My Berlin Kitchen by Luisa Weiss

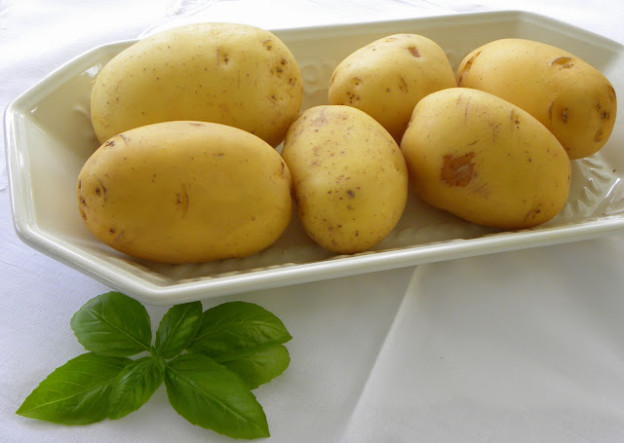
2 lbs. Yukon Gold or other waxy potatoes
3 1/2 tablespoons unsalted butter
2 yellow onions, finely chopped
1/3 cup white wine vinegar
2/3 cup beef or chicken broth
1 tablespoon Dijon mustard
3 tablespoons olive or sunflower oil
1 teaspoon salt
freshly ground black pepper
2/3 cup loosely packed flat-leaf parsley

  1. Wash the potatoes and put them in a pot with cold salted water just to cover. Bring to boil with the lid on; then reduce the heat to medium and cook the potatoes until they are just tender. Depending on their size, this should take between 20 and 30 minutes. Drain the potatoes and let them cool for at least an hour or two and up to overnight.
  2.  Peel the potatoes and cut them into very think slices, about 1/8-inch thick. Put the potato slices into a serving bowl.
  3. Melt the butter in a 10-inch saute pan and add the onions. Mix well and cook for 3 minutes over medium heat. Pour in the vinegar and the broth. Add the mustard and stir well. Let the mixture simmer over low heat for an additional 3 minutes.
  4. Carefully y whisk in the oil, and then pour the hot marinade over the sliced potatoes and mix well. The potatoes will take a few minutes to absorb all the dressing. Add the salt and add as much freshly ground pepper as you’d like.
  5. Just before serving, add the minced parsley to the bowl and mix well. taste for seasoning and serve.

Variations:
If you’d like bits of bacon or Speck in your salad, dice up 3 1/2 ounces and fry the bacon or Speck in the butter for a few minutes before adding the chopped onions (reduce the amount of butter by a talbespoon0.

Or add 1/3 cup of diced French cornichons to the finished salad to bump up the sour, crunchy flavor.

****

I used red potatoes (I had 5 pounds just begging to be used up), red onions (ditto), and about 2 ounces of Speck. I also let the potatoes sit overnight (as Weiss recommended) and they were ridiculously easy to slice by hand. (I’ve sworn off mandolins because I have an overwhelming desire to keep all ten digits.)

Try it. You’ll like it.

And don’t forget to drop by Bookshelf Bombshells for the full book review.
 
Photobucket


Pumpkin Spice Cheesecake Poke Cake

It’s October, and the first hints of fall are in the air some of you already have temps dropping into the 30s and SNOW! Our idea of fall down here in the Sunshine State means temps in the mid-80’s, but it’s still time to bring on the pumpkin: pumpkin cookies, pumpkin candies, pumpkin air fresheners, and pumpkin lattes. I like an addiction—I just can’t get enough. {Though, from now on I’ll splurge on some Dunkin Donuts pumpkin coffee beans or pumpkin spice creamer instead of spending four bucks on that Starbucks concoction. I know, I’m in the minority.}

In honor of this sweet smelling season, I decided to experiment with a new pumpkin recipe. All of the moist, gooey poke cake recipes floating around Pinterest have me salivating. Hmmm. . . One of my favorite cakes is spice cake. Spice cake usually has cream cheese frosting. But I wanted something with less guilt and lower fat than traditional cake, something like . . . pumpkin poke cake.

Yes, I uses mixes, but I never claimed to be a from-scratch baker. But there is no oil, healthy pumpkin, and sugar-free pudding. Not completely guilt-free, but a ton less fat and calories than traditional cake.

Oh, and did I mention it’s quite tasty?

Pin It
Pumpkin Spice Cheesecake Poke Cake
 
INGREDIENTS
  • 1 box (18.25 oz)  spice cake mix
  • 1 cup pumpkin purée (not pumpkin pie mix)**
  • 3 large eggs
  • 1 cup water
  • 2 boxes cheesecake instant pudding
  • 4 cups milk
  • cool whip (or your own whipped cream if  you insist)
  • cinnamon butter pecans (see recipe below)
DIRECTIONS

  1. Preheat oven to 350 degrees.
  2. Combine cake mix, water, eggs, and pumpkin. Beat with electric mixer at low speed for 30 seconds then high speed for 2 minutes.
  3. Pour into greased 9 x 13 inch pan and bake according to package directions.
  4. Let cake cool for a few minutes. Take a chop stick, wooden spoon handle, or other similar shaped object and poke holes all over the cake. Poke down to the bottom.
  5. Make pudding according to directions (pudding mix + 4 cups milk — whisk for about 2 minutes).  Pour pudding over cake. Using a spatula or the back of a spoon, gently push some pudding down into the holes. It wont all fit, but go over a few times.
  6. Chill in refrigerator.
  7. Add whipped topping once completely cool.
  8. Sprinkle with cinnamon sugar buttered pecans (recipe below) just before serving.
  9. Enjoy!

Pin It

 Cinnamon Sugar Buttered Pecans

  • 1/2 pound pecans
  • 1 tablespoon clarified butter (or just add a splash of evoo to your regular butter)
  • 1/8 teaspoon  salt
  • 1 1/2 tbsp. sugar (or 1/4 teaspoon Sweet Leaf Stevia)
  • 1 tablespoon cinnamon
  • 1/4 teaspoon vanilla extract
On a lightly greased cookie sheet, LIGHTLY toast pecans for 5 about minutes. Watch so they don’t burn. Meanwhile, mix dry ingredients. Melt butter & evoo in pan. Add in toasted pecans. Mix and coat for 2 min. Toss with sugar mix. let cool. Store in fridge.

**Wondering what to do with that extra pumpkin? Wait until my next recipe. I used it up in a yummy, healthy snack.

Craving Comfort: Time for Mac & Cheese with Sausage & Peas

Sometimes we just need comfort food. We crave comfort food. We think we will clean-out the chocolate section of Walmart if we can’t have some comfort food.

Last night I was in desperate need of some comfort food. My sad & stressed out body pleaded for some homemade mac and cheeses.

Only one problem: my husband won’t eat the stuff.

Yes, I know. . .how can anyone not like mac and cheese? It’s unAmearican. It’s sacrilegious. Luckily he had enough redeeming qualities that it wasn’t a deal-breaker discovery.

His intense aversion is the result of some childhood trauma {stomach flu & a box of Kraft?} so for the past 35+ years he hasn’t touched the stuff. When we first met he couldn’t even look at it. He graduated to serving it once we had a kid (because every other kid in the world loves the stuff).  When we visited Savannah, he actually tried Paula Deen’s heavenly, gooey dish and. . .he LOVED it.  But only because Paula made it. He trusted Paula more than me.

Yesterday, every taste bud and nerve center was crying out for some homemade m&c. I remember the smell wafting through the house when my mom would bake a batch. It was often accompanied by smoked sausage, split down the center and broiled until slightly crispy and browned.

I needed some. I didn’t have any Velveeta like my mom’s recipe called for. I turned to Panera’s recipe.

Because everyone (including my crazy husband) loves Panera.

It’s a pretty basic recipe. I made a few alterations and added smoked sausage and peas to make it a complete meal.

The comfort factor just oozed though the cheese, and the sharpness of the cheddar combined with the smokiness of the sausage warmed me from the inside. And the husband loved it.

Win.


Pin It

Stove Top Macaroni & Cheese with Smoked Sausage & Peas


Ingredients

1 (16-ounce) package of small shaped pasta (like shells or rotini twists)
1/2 package frozen peas
1/2 small onion, finely chopped (optional)
12-14 oz. package fully cooked smoked sausage (we like the turkey) sliced into rounds
4 tbsp. butter + 1 tbsp. butter
4 1/2 tbsp. flour all-purpose flour
2½ cups milk (any milk or cream)
cheese: 6 slices white American cheese, chopped
            and 1 cup (8 ounces) shredded extra-sharp white Vermont cheddar
            OR
            12 oz. Sargento Chef Blends Shredded 4 State Cheddar Cheese
1 tablespoon Dijon mustard
1 teaspoon salt
¼ teaspoon hot sauce

Instructions

  • Prepare pasta according to package directions.
  • Prepare peas according to package directions. (I always just toss them in with the pasta during the last 5 minutes of cook time—probably a no-no, but works for me. If you do so, add 1 minute to total pasta cook time.)
  • Melt 1 tbsp. butter in pot. Saute the sausage and onions for about 3-5 minutes. Remove from pot with slotted spoon.
  • In same pot, melt remaining 4 tbsp. butter over low heat. Whisk in flour and cook 2 minutes, stirring constantly.
  • Gradually whisk in milk. Cook over medium heat, whisking until mixture thickens and bubbles, about 8 minutes. Remove from heat.
  • Add cheeses, stirring until cheese melts and sauce is smooth.
  • Stir in mustard, salt, and hot sauce.
  • Stir in pasta, sausage, and peas. Cook over medium heat for 1 minute (or until thoroughly heated).
  • Serves 4 to 6


Nutella Banana & Peanut Butter Banana Mini Muffins

It’s Back-to-School time and back to beating lunch box boredom. So many of us are *trying* to eat healthier, but it’s nearly impossible to avoid those pre-packaged snacks hyped up on sugar and preservatives. And if you still have to pack for snack time, you need to creatively find even more portable yet healthy foods to tempt often picky eaters.

My kiddo has now braces, so I am even more limited in my snack selections — no gooey fruit snacks, fruit roll-ups, granola bars, raisins, or nuts. What else can you pack in a kid’s lunch box?

Muffins.
Mini muffins are always a hit.

They are like little cupcakes, minus the excess sugar and frosting. You can bake a big batch and freeze them. You can even  pack them individual snack bags before you stick them in the freezer, then just grab a bag in the morning and they will thaw buy lunch/snack time. A little effort and you can have a month’s worth of healthy and delish snacks.

And these are delish.  I made the mistake of pulling them from the oven while I had a housefull of 8-year-old boys. I had to fight them off with a wooden spoon.  They all loved these two-bite delights— and their parents did too.

These muffins are perfect for snacks — low in fat, high in protien. And they are easy. Seriously. Minus the time it took for me to throw a bag of frozen peas on my burn (I can’t get near an oven without at least one burn) I whipped these up in a jiffy. And they were totally worth the 2-inch burn.

Both these recipes are nearly identical, the main difference being peanut butter vs. Nutella. I assumed the Nutella version would make me swoon more, but the peanut butter muffins hit me with more flavor. The decision was split amongst my taste testers. They are both awesome.

muffin recipes, mini muffin recipe,Pin It

Banana Peanut Butter Mini Snack Muffins

(Inspired by a Cooking Light bread recipe)

Prep time: 10 minutes
Cook time: 15 minutes per batch
Makes 4 dozen bite-sized muffins

1  1/2 cups mashed ripe banana {about 3 large}
1/3 cup peanut butter {creamy or crunchy – whatever you like}
1/3 cup applesauce {or Greek yogurt for extra protein}
3 tbsp. melted butter
2 eggs
1/2 cup packed brown sugar
1/2 cup white sugar
1 cup all-purpose flour
1/2 cup whole wheat flour {you can use all white flour}
1/4 cup ground flaxseed
1/2 tsp. salt
3/4 tsp. baking soda
1/2 tsp. cinnamon
pinch of nutmeg
pinch of clove

**non-stick cooking spray

  • Heat oven to 350 degrees.
  • In a large bowl, add first five ingredients — all the wet stuff. Beat with a mixer at medium speed until smooth {and all the banana chunks are gone}.  Add the sugars and blend more.
  • In a seperate bowl, combine all remaining ingredients {the dry stuff}. Stir gently. Add dry mix to the wet mix and beat with mixer until just combined.
  • Spray mini muffin pan with non-stick cooking spray. ** Fill each cup about 3/4 full. {I use a trigger cookie scoop.  One scoop fills each cup perfectly with no dribbles. Totally worth $7 bucks.}
  • Bake at 350 degrees for 15 minutes.
  • Pop out of pan and cool on wire rack.

** You can also add mini chocolate chips or crushed peanuts for some extra oomph.

*I recommend not using pretty cupcake liners, especially if you are using these for a kids’ snack. Peeling them takes too much time when you just want to devour them.

nutella recipes, snack recipes, kid's snacksPin It

Nutella Banana Mini Snack Muffins

Prep time: 10 minutes
Cook time: 15 minutes per batch
Makes 4 dozen bite-sized muffins

1  1/2 cups mashed ripe banana {about 3 large}
1/3 cup Nutella
1/3 cup applesauce {or Greek yogurt for extra protein}
3 tbsp. melted butter
2 eggs
1/2 cup packed brown sugar
1/2 cup white sugar
1 cup all-purpose flour
1/2 cup whole wheat flour {you can use all white flour}
1/4 cup ground flaxseed
1/2 tsp. salt
3/4 tsp. baking soda
1/2 tsp. cinnamon
2 tbsp. baking cocoa

**non-stick cooking spray

  • Heat oven to 350 degrees.
  • In a large bowl, add first five ingredients — all the wet stuff. Beat with a mixer at medium speed until smooth {and all the banana chunks are gone}.  Add the sugars and blend more.
  • In a seperate bowl, combine all remaining ingredients {the dry stuff}. Stir gently. Add dry mix to the wet mix and beat with mixer until just combined.
  • Spray mini muffin pan with non-stick cooking spray. ** Fill each cup about 3/4 full. {I use a trigger cookie scoop.  One scoop fills each cup perfectly with no dribbles. Totally worth $7 bucks.}
  • Bake at 350 degrees for 15 minutes.
  • Pop out of pan and cool on wire rack.

** You can also add mini chocolate chips for some extra oomph.

*I recommend not using pretty cupcake liners, especially if you are using these for a kids’ snack. Peeling them takes too much time.


Once the muffins cooled, I packed them first into snack bags and them into a gallon-sized freezer bag.  Now each school morning I can just grab a pre-packed bag from the freezer and pop it straight into the lunch bag. It’s perfectly thawed by lunch time.

Happy mom, happy kid.

Pin It

DEMETRIE’S Infamous CHOCOLATE PIE {you know the one I’m talking about}

Today’s recipe is from The Book Club Cookbook by Judy Gelman and Vicki Levy Krupp, a compilation of 100+ recipes from favorite classic and contemporary novels.  The thoroughly delicious book review is up at Bookshelf Bombshells.com.

I simply could not resist trying Demetrie’s Chocolate Pie from The Help by Kathryn Stockett. If you read the book (it must have been in the movie, too) you know the pie I’m talking about — the best chocolate pie south of the Mason-Dixon line — with a little extra bit of something dark and rich in it if you happen to be a nosy racist b*tch.

*recipe courtesy of The Book Club Cookbook by Judy Gelman and Vicki Levy Krupp*

1 2/3 cups water
5 tbsp. Sweetened cocoa powder, such as Ghirardellis (must not contain milk)
3 tbsp. Cornstarch
1 14-ounce can sweetened condensed milk
3 egg yolks, beaten
2 tablespoons butter
1 tsp. Pure vanilla extract
1 9-inch ice shell (plain or graham cracker)
**See graham cracker recipe below

whipped cream (or if it’s not too humid, you can top with meringue)

  1. In a medium-size cool saucepan, mix water, cocoa, and cornstarch with a whisk until all the lumps are gone, making a paste. Stir in condensed milk and egg yolks. Heat     to just under a boil and stir until it’s thick.


  1. Reduce heat to low and stir in butter. Add in your good vanilla, and keep stirring well. Turn off the heat and let it cool some. Pour into a prebaked pie shell, store-bought if that’s how you do things.


  1. Let the pie set up in a cool spot, like a plug-in refrigerator, covered with waxed paper so you don’t get a skin. Dollop cream on tip, or top with meringue.


Yield: One 9-inch pie, 6 to 8 servings.

**Now, needless to say, I made the scrumptious chocolate pie sans the special ingredient. (If you read the book, you what I’m referring to.) Show up at your book club with this pie and your cohorts will most likely force you sample a slice first. Once they see the chocolate bliss on your face, they will dig right in and the compliments and bathroom humor will start flowing.

This is simply the best damn pie crust in the world. It’s easy (as pie!) to make and makes everything taste better. Everything. {Sorry Mom, the secret is out. . .}

prep time: 5 minutes
bake time: 10 minutes

9 whole graham crackers (1 1/3 cups crumbs)
1/4 cup sugar
1 tsp. cinnamon
1 stick melted butter or margarine ( 1/2 cup)
**optional 1/4 cup shredded coconut

*If starting with whole graham crackers, put them inside a gallon sized ziploc bag.  With a meat mallet, or wooden rolling pin mash to fine crumbs. {Great way to get out stress for a minute!}

Mix together crumbs, sugar, and cinnamon. Add melted butter/margarine. {I usually pour all but 2ish tablespoons in and mix. It should be moist, but not soggy. Add in the rest if necessary.}

Press mixture firmly and evenly on bottom and up the sides of a greased pie pan. {sometimes wax paper or foil helps, but this is easy}

Bake at 350 degrees for 10 minutes.


Photobucket

Check out the FULL BOOK REVIEW @ BOOKSHELF BOMBSHELLS and make your next book club meeting a feast for your brain and your palate.


and for more ideas check out The Book Club Cookbook.com
Pin It


Pinterest HIT: Crock Pot Mexican Chicken (and Veggies) Recipe

I am slightly afraid of my Crock Pot. It sits alone, clean and shiny, atop dozens of cookbooks in my cupboard. So many recipes call for browning and precooking before you toss things into it, which seems like an utter waste of time. Why bother?

After seeing half a dozen pins for Crock Pot Taco Chicken, I decided to adapt one of my tried and true stove top recipes. Same concept, just instead of poaching the chicken on the stove (which involves watching and timing) I toss it into the crock pot. So simple, there was no way I could screw it up, right?

crock pot recipes, paleo chicken

Right for once.  Easy. Easy. Easy. Incredibly adaptable. You can add beans and veggies and make it with organic and/or clean ingredients. Make a big batch and freeze leftovers for easy weeknight meals. Total HIT.

Crock Pot Mexican Chicken {and Veggies}

*inspired by pins from Chocolate Therapy and The Gracious Pantry*

basic recipe:

6 pieces boneless skinless chicken breast (I plopped them in frozen)
1 16 oz. jar salsa (I like Newman’s Own Pineapple, Mango, or Farmer’s maket)
1 packet taco seasoning or equivalent (great *clean* recipe here)

healthy options:

1 can black beans (drained)
1/2 bag frozen or small can corn
1 bag Birds Eye frozen bell pepper stir-fry (or fresh sliced onions and peppers if you have them)
1 cup shredded or juilenned zucchini

Arrange the chicken breasts in as close to a single layer in the pot. {I dumped them in frozen.} Add salsa and seasoning and gently mix.

Cook 4 – 6 hours on high (4 worked fine from frozen for me) or 6 – 8 hours on low.

If you are around, flip the chicken after two hours or so so it cooks faster. About 1 hour before you plan on eating (after 3 hrs on high) or when chicken looks pretty cooked through, take it out and shred. It should practically fall apart when you pull at it with two forks. Dump back in pot. Add in beans or veggies and stir. Continue cooking for at least another hour or until you are ready to eat.

Pin It

***If you aren’t home at all while this is cooking you can dump it all in at one time. I just happen to be home and I like my veggies crisp if possible.

***Serve on tortillas, over rice, in enchiladas, as fajitas — the options are endless.  Add your favorite cheese, veggies, sour cream, guacamole, etc. and you have a meal.

***With chicken, black beans, corn, and peppers, this made easily enough for 3 meals for 2 adults + 2 kids.  Leftovers went straight to the freezer for easy meal to thaw.

Easy. Healthy. Hit.
Did you try any Pinterest inspired recipes this week? How did they work?
 Leave a link in the comments if you’d like to share.
Follow Me on Pinterest


Pinterest Hit or Miss Monday – Zucchini Tot FAIL

They looked so good: wholesome, family friendly, healthy, fun. . .

They were a royal PITA.


Zucchini Tots. They were called zucchini bites, but I like “zucchini tots” better.
 They are the healthy version of tater tots. 
The recipe for these couldn’t be any easier. 
~ Pinterest caption
Zucchini Bites
Recipe adapted: The Naptime Chef
yields: 12 mini muffins

1 cups zucchini, grated
1 egg
1/4 yellow onion, diced
1/4 cup cheese (cheddar or Parmesan work the best)
1/4 cup bread crumbs – I used Italian style
Salt and Pepper

1. Preheat oven to 400F. Spray a mini-muffin tin with non-stick spray, set aside.
2. Grate the zucchini and then place in a dish towel to squeeze out the excess water- like when using frozen spinach; if you skip this part, the middle of the zucchini tots will be really soggy while the outside gets crispy and no one wants that.
3. In a bowl combine, the egg, onion, cheese, bread crumbs, zucchini, salt and pepper.
4. Using a spoon or a cookie scoop, fill the muffin cups to the top. Bake for 15-18 minutes, or until the top is browned and set.

 ********************

They looked so good I made a double batch.

I used my handy-dandy mini food processor to grate my zucchini early in the day — so simple. I headed the warning about the *really soggy* mess and drained the zucchini pulp on paper towels for hours in the fridge then squeezed the living tar out of it before mixing.

Apparently not nearly enough.

I used cheddar cheese (you can never have too much cheddar) and followed the recipe exactly.

They smelled divine cooking. My tummy rumbled.

I got this:
 

 They suck to the pan, the insides were complete mush, and there was not a hint of *totness* anywhere in my kitchen even after I baked them ten minutes longer than called for.

I can only assume I didn’t squeeze hard enough or I had some really damn juicy ‘chinnis.

They DID taste divine, and I piled the mess onto our plates. Even the kid said it was yummy. It tasted just like squash casserole to me — pretty much the same thing, so next time I’ll just make the much less time consuming casserole.

Oh, and the pan. . . it took two days of soaking to get that darn non-stick pan clean.

I’d have to vote this as a MISS.

Vinobaby's Voice

Follow Me on Pinterest
Pin It

Foolproof French Onion Soup — Flippant Foodie Friday

Spring has almost sprung down here in the South, so I’m sneaking in my last warm and hearty dinners before it gets to warm. I eat a steaming bowl of soup for lunch whenever the temperature dips below 70 degrees.  And if I can make a savory pot of homemade deliciousness for dinner, even better.


Foolproof French Onion Soup

Cook Time: about an hour
Serves : 4 main course bowls

  • 3 tablespoons butter
  • 4 medium onions (I prefer Vidalia, but any sweet or yellow variety will do)
  • 1 48 oz. container beef broth/stock (or vegetable if you are meat-free)
  • 1 14 oz. can chicken stock (or vegetable)
  • 1/2 teaspoons Herbs de Provence
  • 2-3 cloves garlic, crushed or finely chopped
  • 4 slices hearty bread (cibatta or artisan) OR  croutons
  • 4  slices cheese (fonitna, smoked gouda, gruyere, or muenster are all good)
  • 1 generous tablespoon brandy
  • salt and pepper to taste

Slice the onions — the thinner the better. In a large saucepan, melt butter. Add the onions and cook with the lid on, stirring every few minutes, for at least 10 minutes (just tender) to 30 minutes (caramelized). Your call, but the longer, the sweeter and more tender they will be.  Add in the garlic and Herbs de Provence about the last 2 minutes and stir.

Deglaze the pan with the brandy (scrape up all the good little burnt bits from the pan).  Add the broth. Simmer soup for at least 20 minutes, or until onions are melt-in-your-mouth tender.

Meanwhile, if you are using bread, lightly butter and season with garlic, if you so desire. Toast lightly. Cut into cubes.

Preheat broiler. Ladle soup evenly between 4 ovenproof bowls. Spread bread or croutons over the top. Cover with cheese. Broil for 3-5 minutes, or until the cheese is slightly browned and bubbling.

Garnish with fresh chives or green onions, if you have any on hand.

Serve with fresh bread or sandwiches for a savory meal.

Easy Rum Ball Recipe — Great Gifting

Looking for a homemade holiday treat  for a cookie swap, office party, or neighborhood gifting?  Want something easy, delicious, and memorable?  How about a treat with a kick?

Rum Balls are tasty, look as if you spent hours slaving away in the kitchen and can make any holiday gathering tolerable.  Plus they are simple enough to make even if you sneak a few nips from the rum bottle. Perfect.

*Note: these are not for children (unless you want them to sleep*). Alcohol IS a main ingredient. 

Rum Balls

Time: roughly 30 minutes
Yield: about 3 dozen

2 cups crushed vanilla wafers**
1 cup crushed coconut or pecans (works best to chop in a food processor)
1 cup confectioners sugar
2 tbsp. coco powder (you can add up to 1/2 tsp. more if you want them more chocolaty)
2 tbsp. white corn syrup (or honey)
1/3 cup rum (I like Captain Morgan)
extra coco, sugar, or chopped coconut for coating/dusting

  • Mix all ingredients.
  • Add desired dusting materials to a shallow dish.
  • Scoop out about a tablespoon of mixture (use a cookie scoop for speed and consistent size) and roll into balls. (This is easier if you keep your hands damp.)
  • Roll each ball in the dusting sugar or coconut to coat evenly.
  • Set each ball onto a wax paper covered cookie sheet and chill in refrigerator.

The longer they sit, the tastier they will be.

Place each ball in a mini cupcake wrapper for an impressive display.

*Just kidding. I would never advocate giving kids rum. Though, my MIL still swears bourbon is the best thing for a teething baby…

**If you want to be creative, you can play around with flavors. For a more chocolatey vibe, use 1 cup crushed chocolate wafers.  For a little bit of spice, use 1 cup of ginger snaps and dust with the crushed cookies as well. (I tried this and they were the bomb.)

Potato, Prosciutto & Fontina Cakes — Flippant Foodie Friday

The holiday meal: family, friends, good times and high drama all often playing out around the dressed up dining room table. Don’t you ever just wish you could set out a meal to wow them all — you could Cook Like a Rock Star, and leave them speechless, stuffed, and fully sated?

Over at the Bookshelf Bombshells I reviewed Food Network star Anne Burrells’s new book Cook Like a Rock Star. Head on over to check out the full review.

Although there were many recipes from the cookbook I was nearly dying to attempt, truffles and lobster were simply not in my budget for the week. But prosciutto I always have on hand. I paired this savory side with some juicy steaks, but it would be a perfect accompaniment for any holiday roast or turkey.  This dish would certainly impress your In-Laws and put your fussy Aunt Eunice’s plain old mashed potatoes to shame. Wouldn’t that be fun?

Potato, Prosciutto & Fontina Cakes
Serves: 4
Time: About 2 hours

Mise en Place
2 pounds Yukon gold potatoes, peeled and cut into quarters
Kosher salt
¼ cup heavy cream
¾ cup freshly grated Fontina cheese
½ cup prosciutto, cut into 1/4-inch dice
2 large eggs
Extra virgin olive oil

ANNE ALERT!
These lovely cakes need to chill for at least an hour before cooking so if you want to really streamline the operation, make the cakes ahead (even the day before) and stick them in the fridge until you are ready to eat.

  • Put the potatoes in a large saucepan and cover with water, season the water generously with salt.
  • Bring the water to a boil (BTB) and reduce to a simmer (RTS). Cook the potatoes for 25 to 30 minutes, or until fork-tender. Drain the potatoes well.
  • In a small saucepan, heat the cream.
  • While the potatoes are still hot, mash with a potato masher, leaving them a little lumpy: stir in the hot cream.
  • Mix in the Fontina, prosciutto, and eggs and stir well to combine. Taste and add salt if you need — you probably will.
  • Form the potato mixture into cakes about 2 ½ inches wide and ¾ to 1 inch thick. Put them on a baking sheet and refrigerate for at least 1 hour.

  • Preheat the oven to 375 degrees F.
  • Coat a large nonstick saute pan with olive oil and bring to high heat. Working in batches, brown the cakes on both sides, about 2 minutes per side. Place the browned cakes on a baking sheet and transfer them to the oven for 10 to 12 minutes, or until heated through.

–Recipe From Cook Like a Rock Star by Anne Burrell                                                           —Photos by Vinobaby

These were trickier than the recipe made them out to be; the stickiness of the freshly mashed potatoes made them hard to work with, even with the recommended refrigeration. The ingredients made a whopping 16 cakes, and could easily have been ample side dish for eight, instead of the suggested four. But they were quite tasty, and these luscious potato cakes sopped up steak juice perfectly.


Photobucket“/>