Category Archives: crafty

Minecraft Snowflakes!

Minecraft + Christmas. An odd combination, right? With so many Minecraft programs at my library, I’ve been trying to come up with a little something different for each one. Since my next one is the Saturday before Christmas, I needed something…festive.

How about some Minecraft snowflakes?

Have yourself a creeperish little Christmas just doesn’t sound quite right, but it works for kids.

If you do an internet search, Star Wars snowflakes abound. But Minecraft? I found one. And it was challenging for me to cut it out, so leading 50+ five to twelve-year-olds through the tricky cuts wouldn’t be feasible.

So I designed my own.

Minecraft Snowflakes

I think they turned out pretty cool!

If you’d like to make these, the pdf templates are below:

Easy Minecraft Snowflake

Minecraft Snowflake

Tips:

-You don’t have to cut it all out in one continuous cut. You’ll get much cleaner outlines if you cut straight lines, bit by bit.

-The mouth is right along the fold, so it’s pretty easy (especially when you heed above advice). The eye is attached to the nose/mouth, so make a straight cut from the nose to get into that square eye.

Have fun, impress you kids/students/patrons with your knowledge of Minecraft, and get your craft on!


The Thankful Tree

Give thanks.

A simple sentiment so many of us forget to practice now that Thanksgiving has become lost in the shuffle of modern life.

The holiday was once a time for communities to unite, sharing tales of strength, hope, and gratitude among the generations while humbly reflecting upon the abundance in their lives.

For many of us, Thanksgiving had become a day of manic shopping, football, and family drama.

How about we put a little “thanks” back in Thanksgiving?

The Thankful Tree – a great fall library display/passive program. Perfect for classrooms or Thanksgiving table centerpieces, too!

The table had been covered in colorful fall leaves. This was after all my leaves and most of the display books had been taken. (Nice back-lighting and fluorescent lighting, right?)

I’d found these Thankful Trees via Better Homes and Gardens a few years back.

BHG Thanksgiving treeBHG Thanksgiving tree bare branches


It would be easy enough to set up our own library Thankful Tree, right?

If patrons took part, it could be considered a passive program, bringing the community  together and sharing in the reason for the oft neglected season. (And we could gauge which resources our patrons valued. Win-win, right?)

Using an old McCoy jug, a few branches snipped from my yard, and colored printer paper leaves, I set up a Grateful Tree on the library’s main display table last year. I didn’t have high hopes. Even  fellow staffers rolled their eyes when I asked them to share the love on their own leaves.

Fall library display  "Leaf a note and share which library books and services you are thankful for"

And then something beautiful happened.

thankful leaf 2

One leaf…

thankful leaf 1

led to another…

leaves

and another…


leaves 2

  And within days the bare branches displayed a bounty
of thanks and gratitude that made our hearts swell.

thankful leaves library

This library display/passive program was a win for all. It would also work in a classroom
or as a centerpiece for a holiday gathering.

We all need to express the gratitude in our hearts.
Let your patrons, students, or family “leaf” a note to express what really matters in their lives.

DIY Book Fairy Costume

This time last year I sat at my laptop pondering my costume options. It was my first year working at the library on Halloween, and I was finally given the go-ahead to dress up like I haven’t done in eons.

But what to wear?

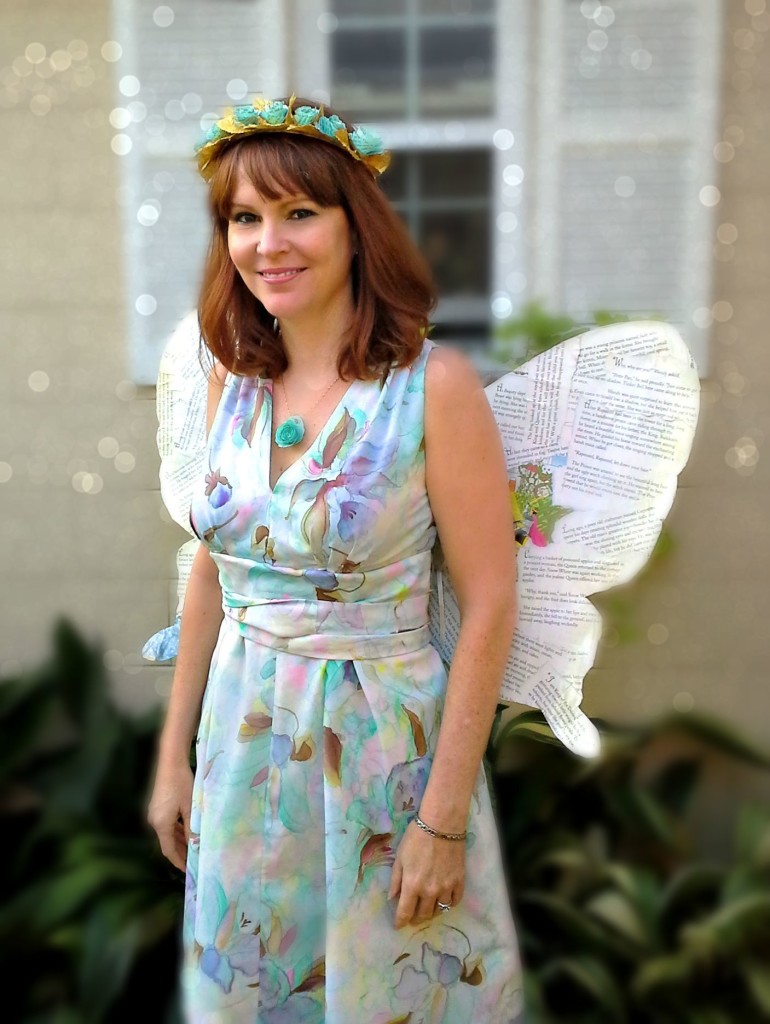
I love books. I love writing. And it had to be work-appropriate. (None of those NSFW hooker costumes for me, thanks.) Who better to be than a BOOK FAIRY? I imagined myself fluttering between the stacks sprinkling fairy dust, bestowing books upon grateful patrons.  (Okay, so maybe I snorted some of that fairy dust by accident.)

A Book Fairy I’d be. But how?

How to make a Book Fairy Costume--this is adorable! Perfect Halloween costume for book lovers, teachers, and librarians!

I scanned Pinterest and found a few examples Book Fairies, Library Fairies, and a cute Diction-fairy. Perfect. Now how to make the wings?

I rang a bell, but nothing happened. (Oh wait, that’s an angel gets her wings…) No magic would help me. I had to murder a book. Mea culpa.

I Instagrammed this pic while doing the dirty deed:

murdered book

And my book loving friends and followers united in their animosity.

But seriously, this was a donated book past its prime. It had lived a good life. And I like to think of it as recycling. Upcycling. Okay, I still felt an itty bitty bit guilty ripping the pages from the spine, but it had to be done. It wasn’t like boiling a live lobster.

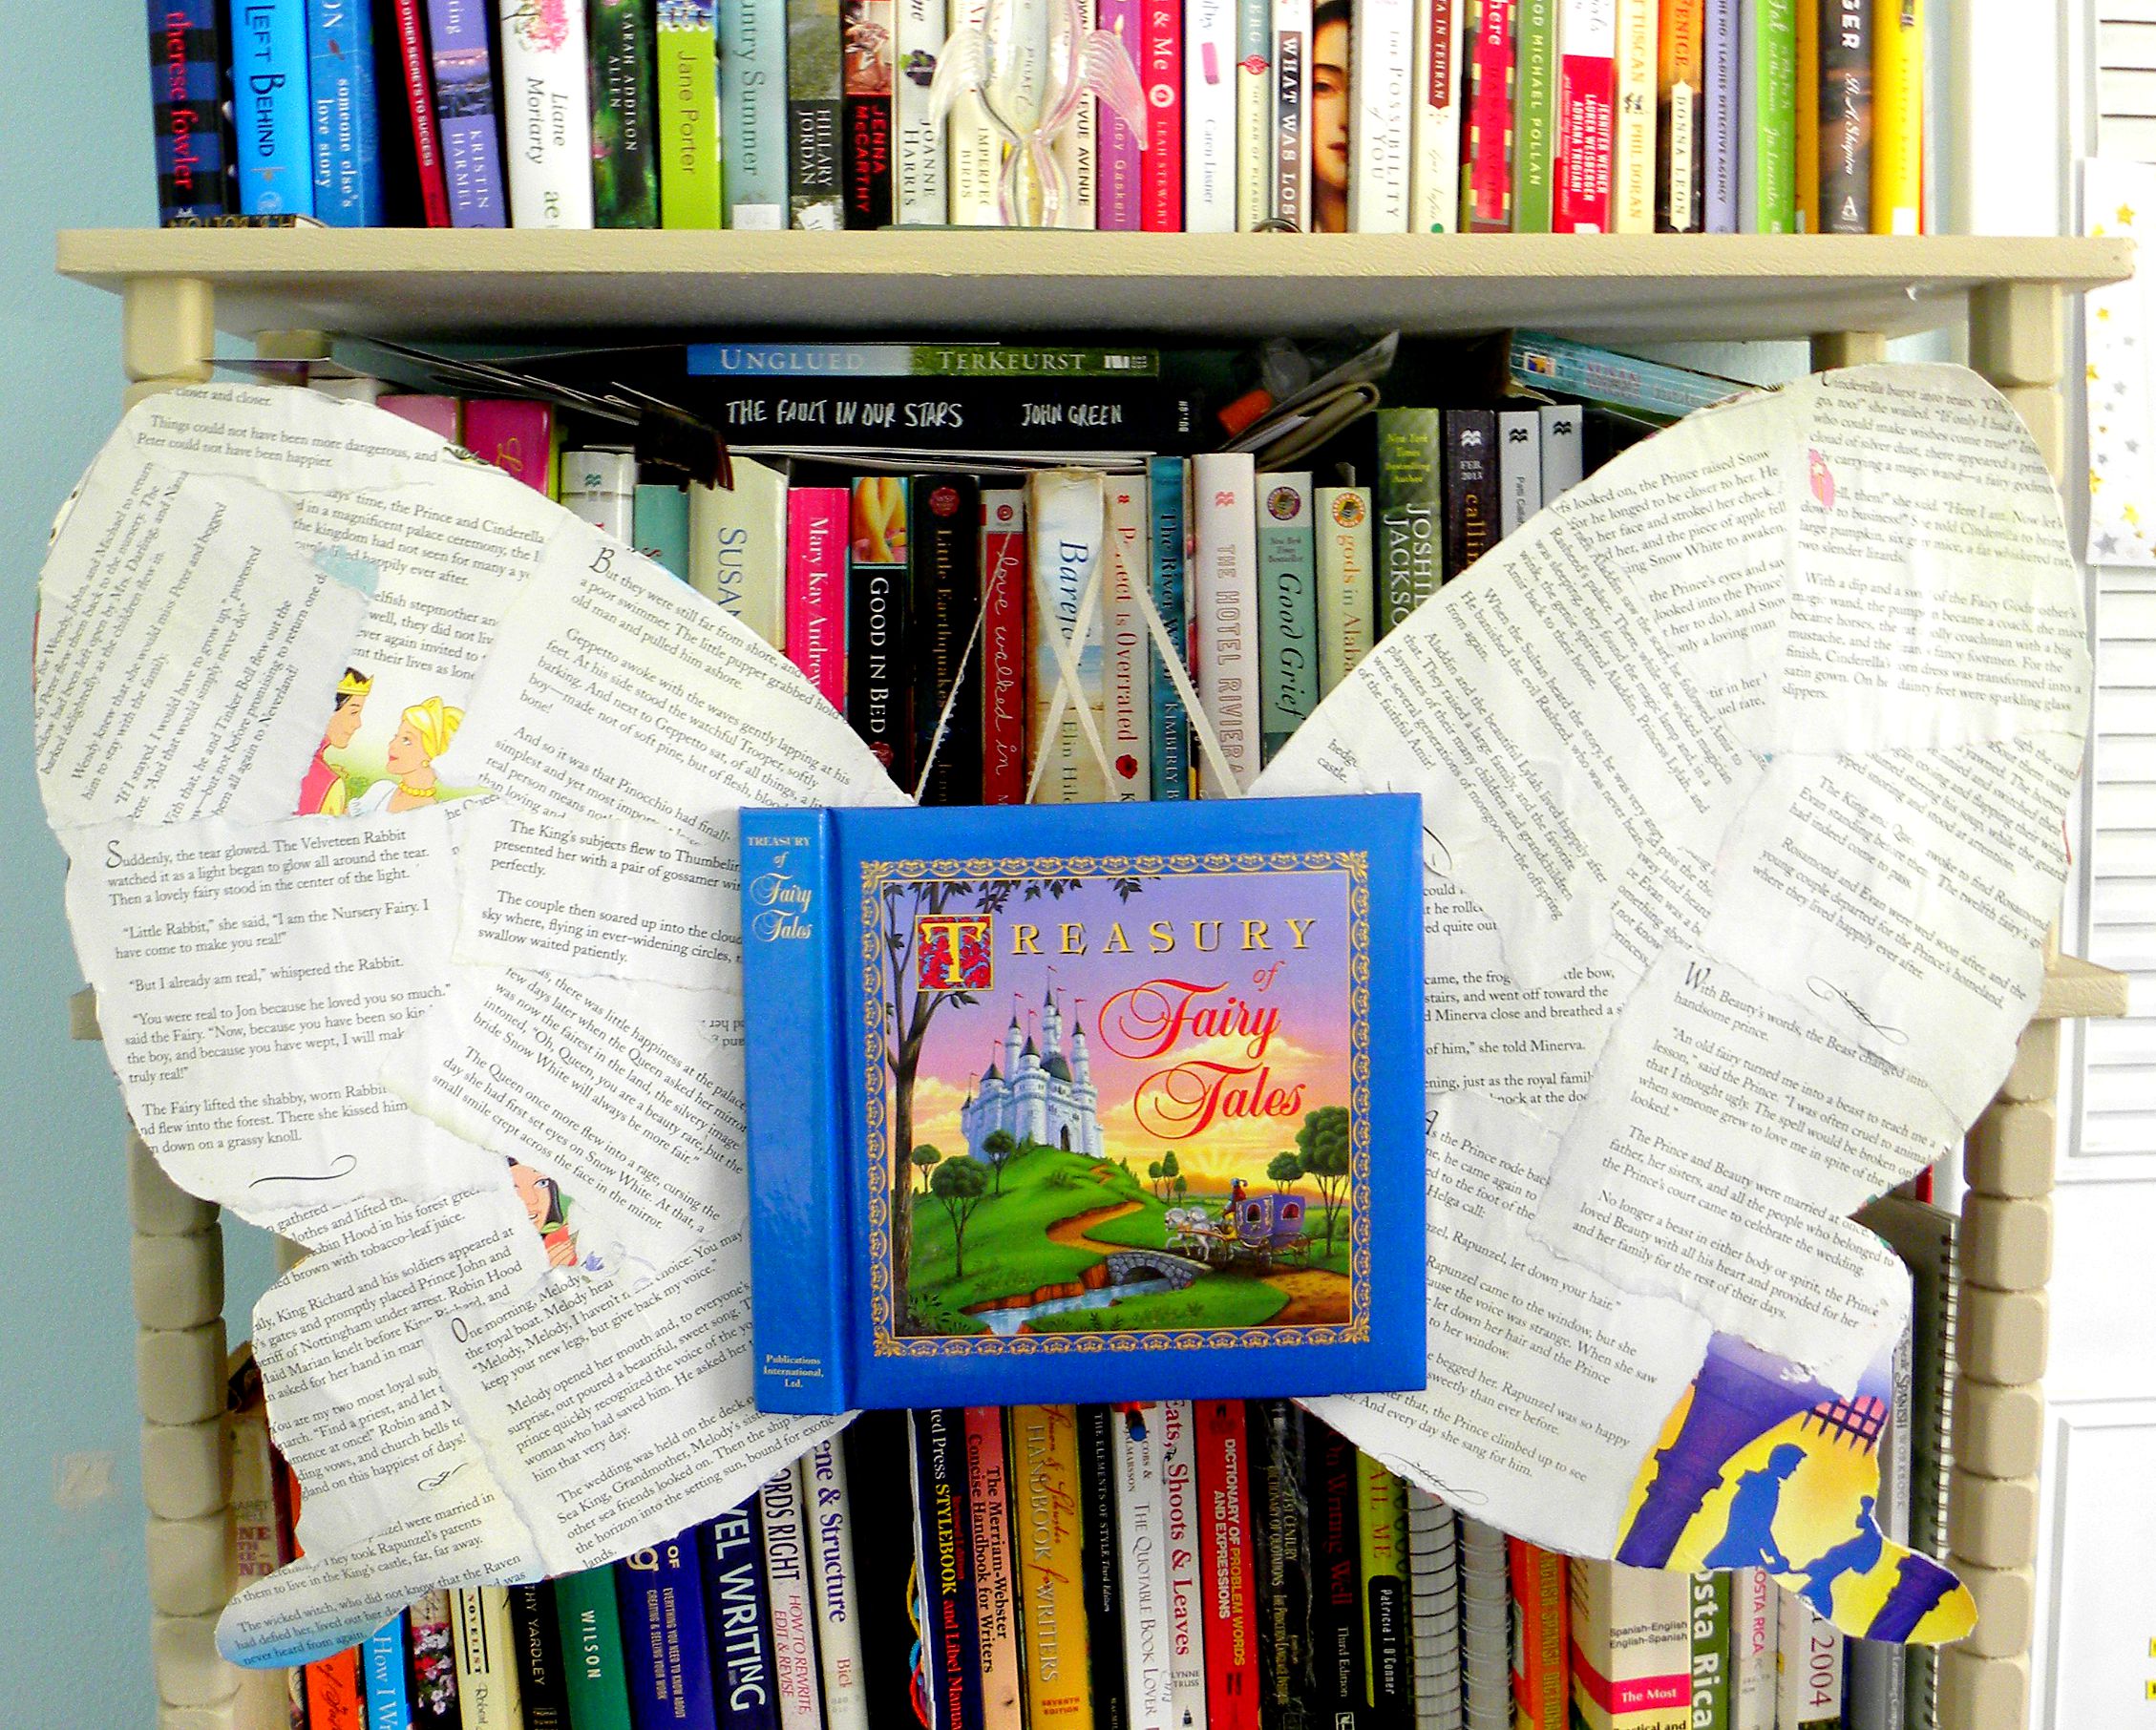
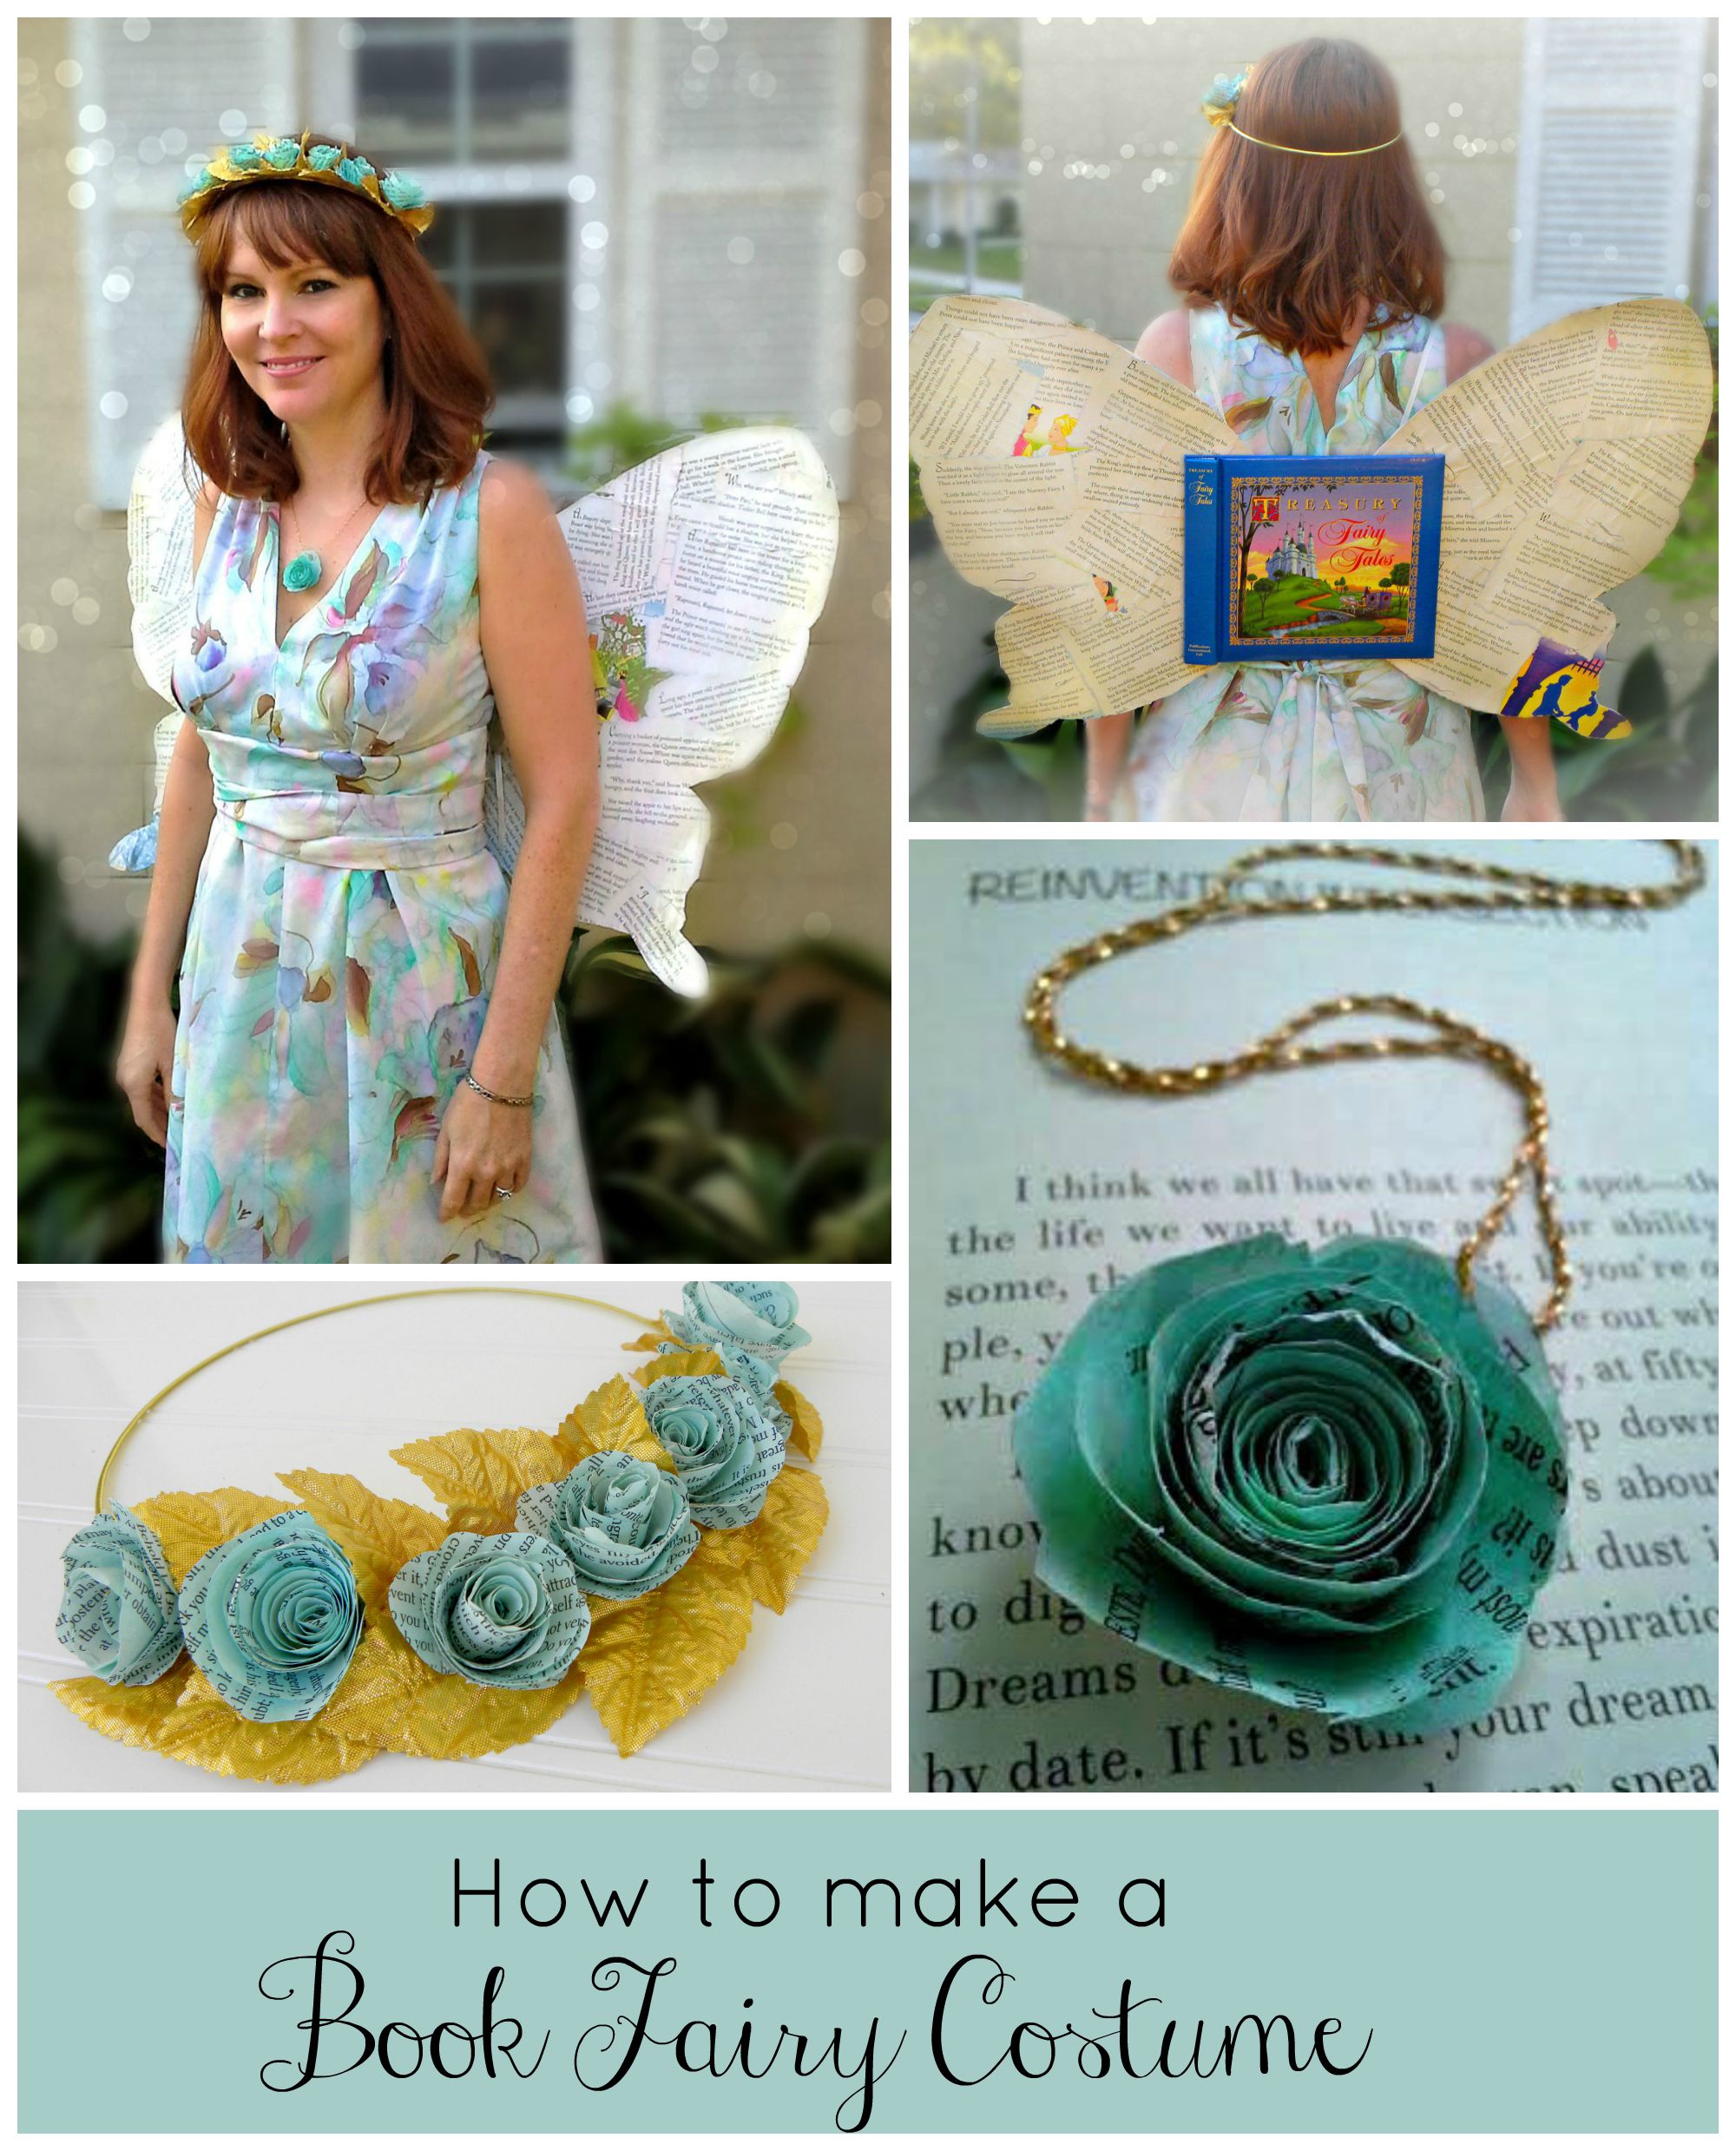
The repressed Crafty-Girl in me had a blast designing the wings, cutting out favorite fairy tale passages to highlight, and making everything sparkle. Figuring out how to attach the wings AND make the straps adjustable for comfort—well, that straddled the line between mystery and adventure, but I figured out how to get my Happily Ever After. You can always cobble your own set of wings together with a nose twitch, duct tape, and shoelaces, but the method below worked for me.

(Please pardon the dorky pics. My hubby snapped a few photos before I ran to work, and of course, I was too shy to pose at the library!)

DIY Book Fairy Costume--love it!!

How to Make Book Fairy Wings

Supplies:

  • large hardback book (I used a 9×9 book, but any size larger than a paperback should work)
  • 2 sheets poster board
  • 3 to 4 yards sturdy ribbon
  • glue (Elmer’s or craft glue)
  • clear packing tape
  • scissors
  • Foam Paint Brush
  • hole punch (optional: Self-Adhesive Reinforcement Labels)
  • Awl or small screwdriver (to make hole in book cover)
  • optional:  spray glitter, regular glitter, or any other extra decorating elements

Instructions:

1.  Carefully rip the pages from the book binding. (Mutter apologies and try not to cry.) Set aside.

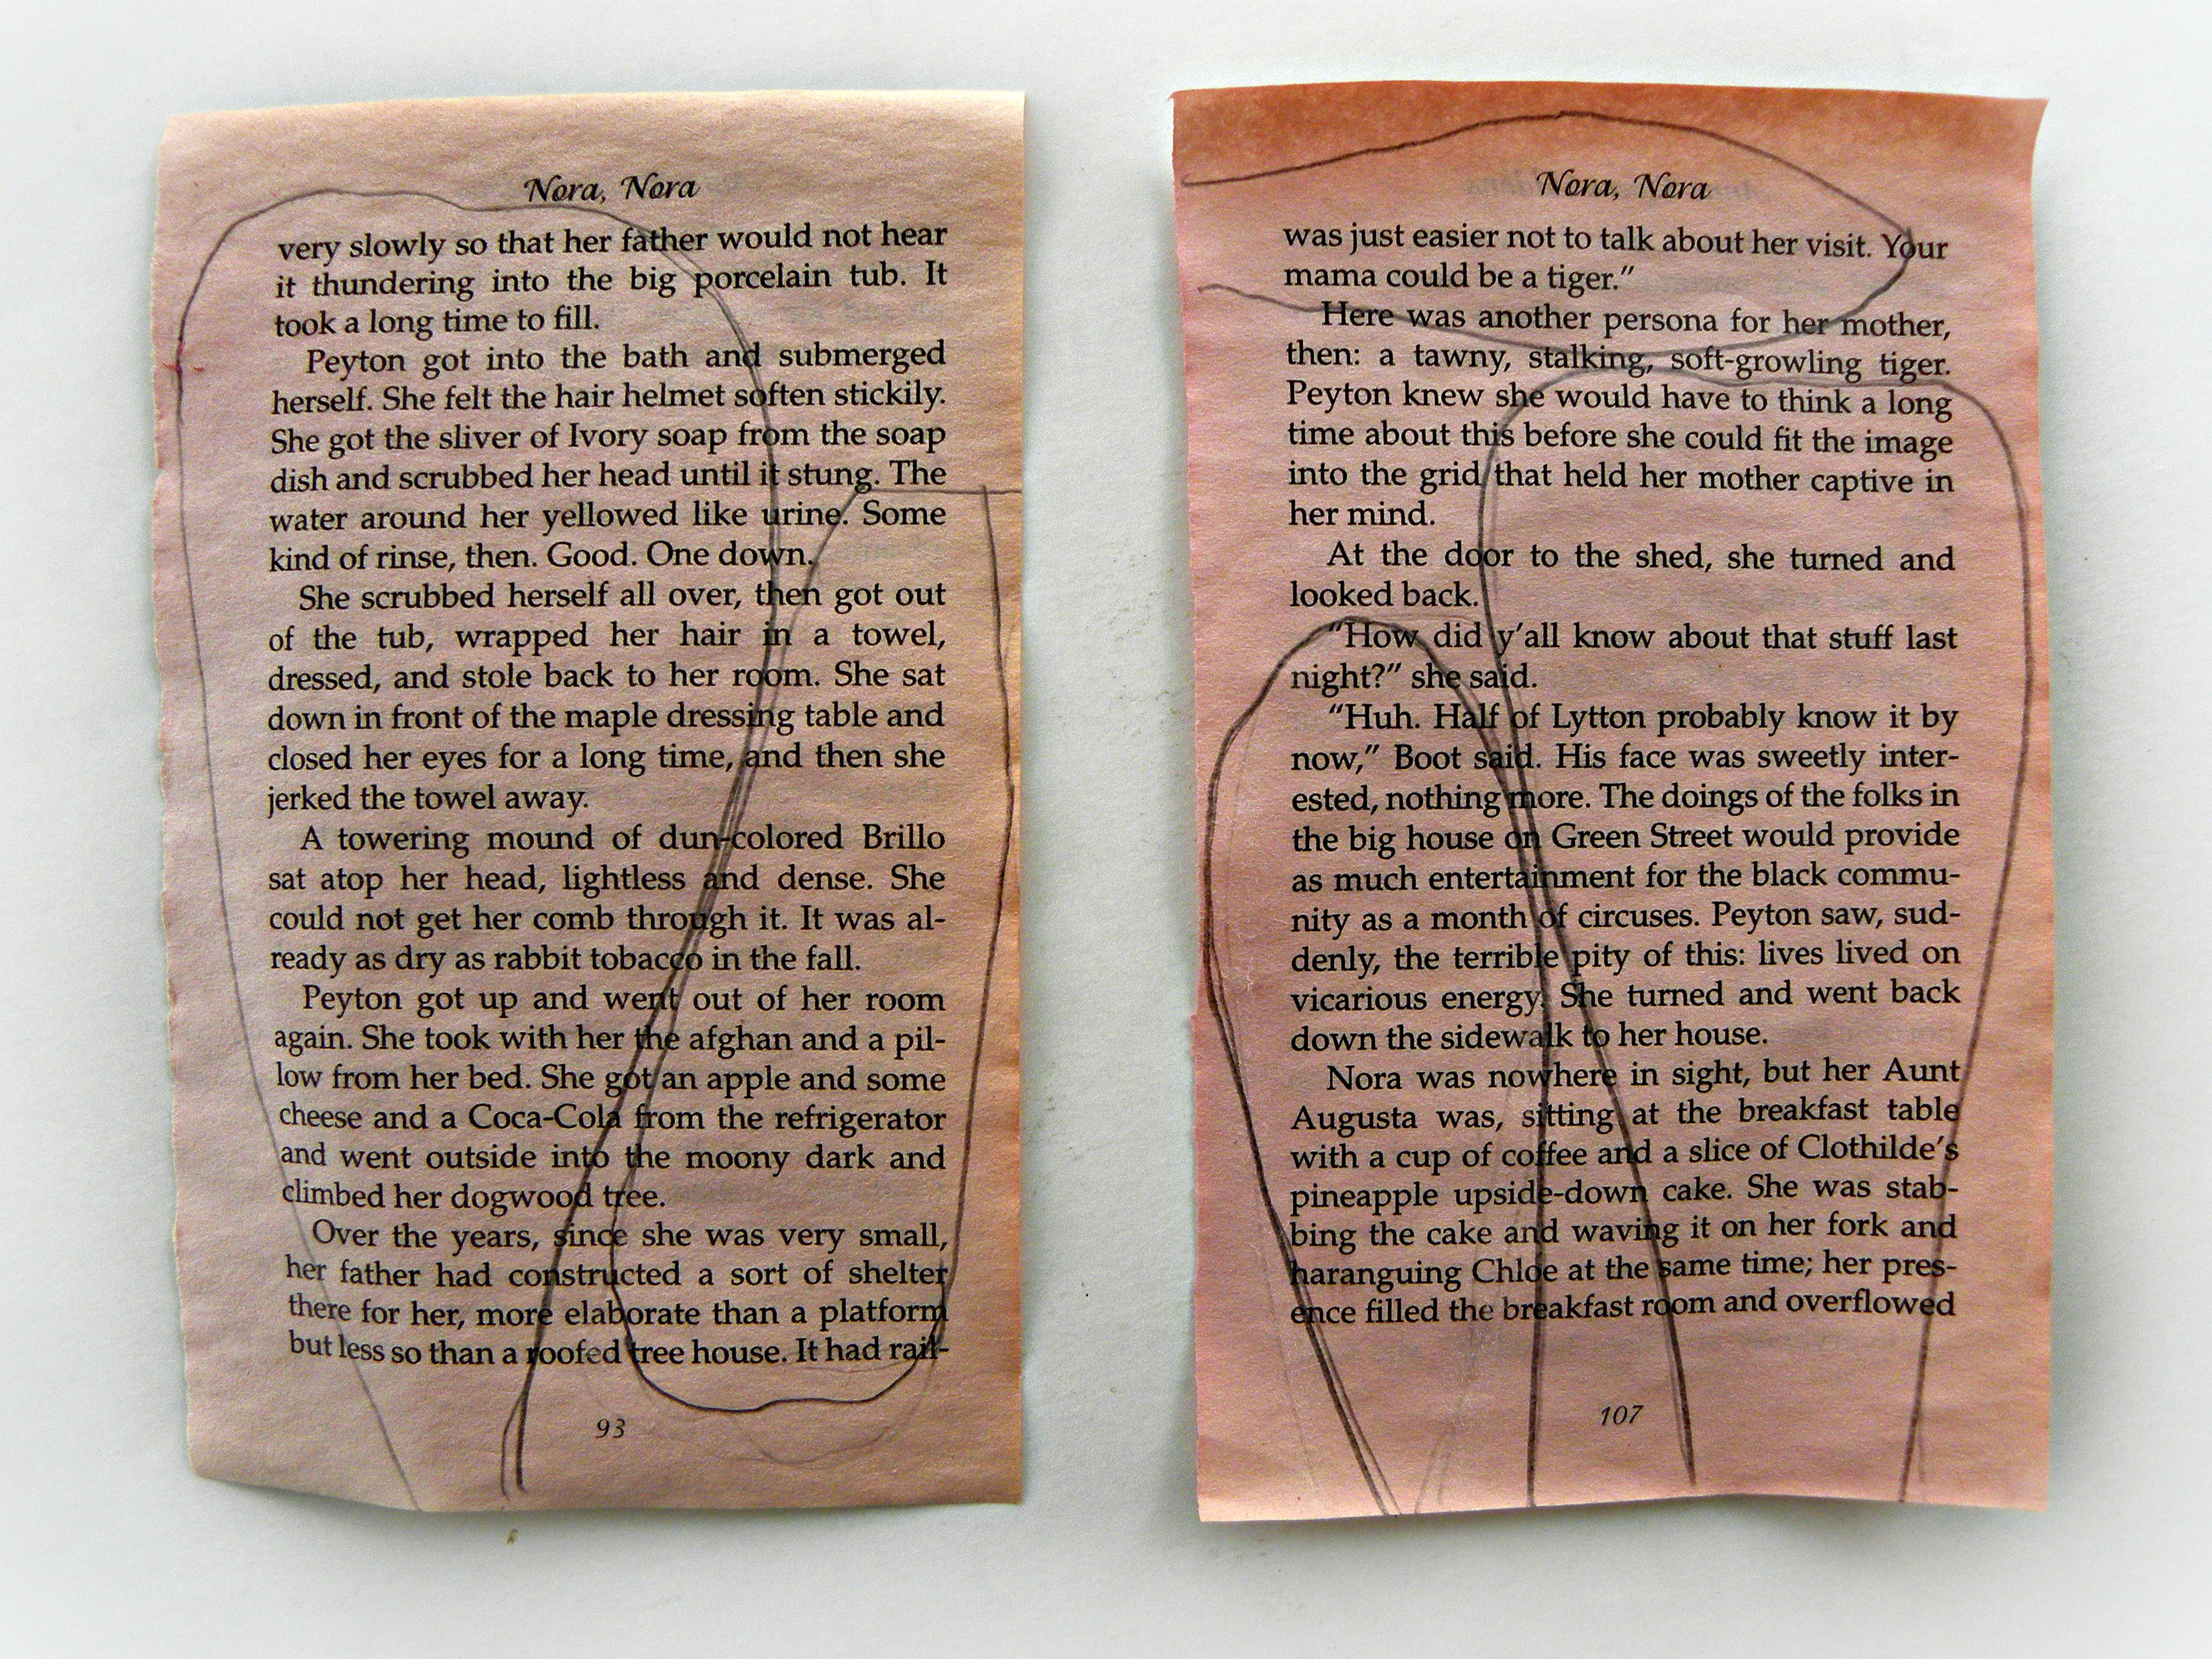
2. Draw wing template. I freehand drew mine—it doesn’t have to be perfect!  Start by placing the book on one sheet of poster board. Decide what wing shape you want (I went for butterfly) and in pencil, draw an outline of the wing. Make it as tall as the poster board, so you have plenty of wingspan, and make sure the inside edges are smaller than the height of the book.

fairy wing template, butterfly wing template

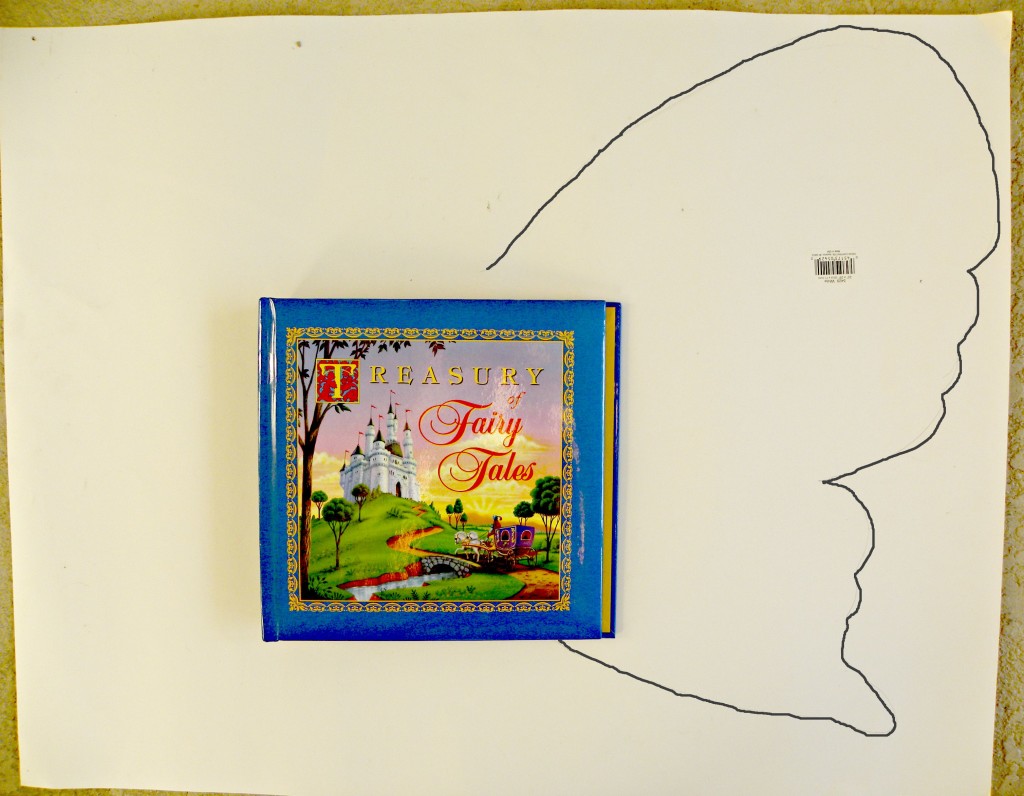
3. Like your wing design? Good. Cut it out. Use it as a template to cut out your other wing.

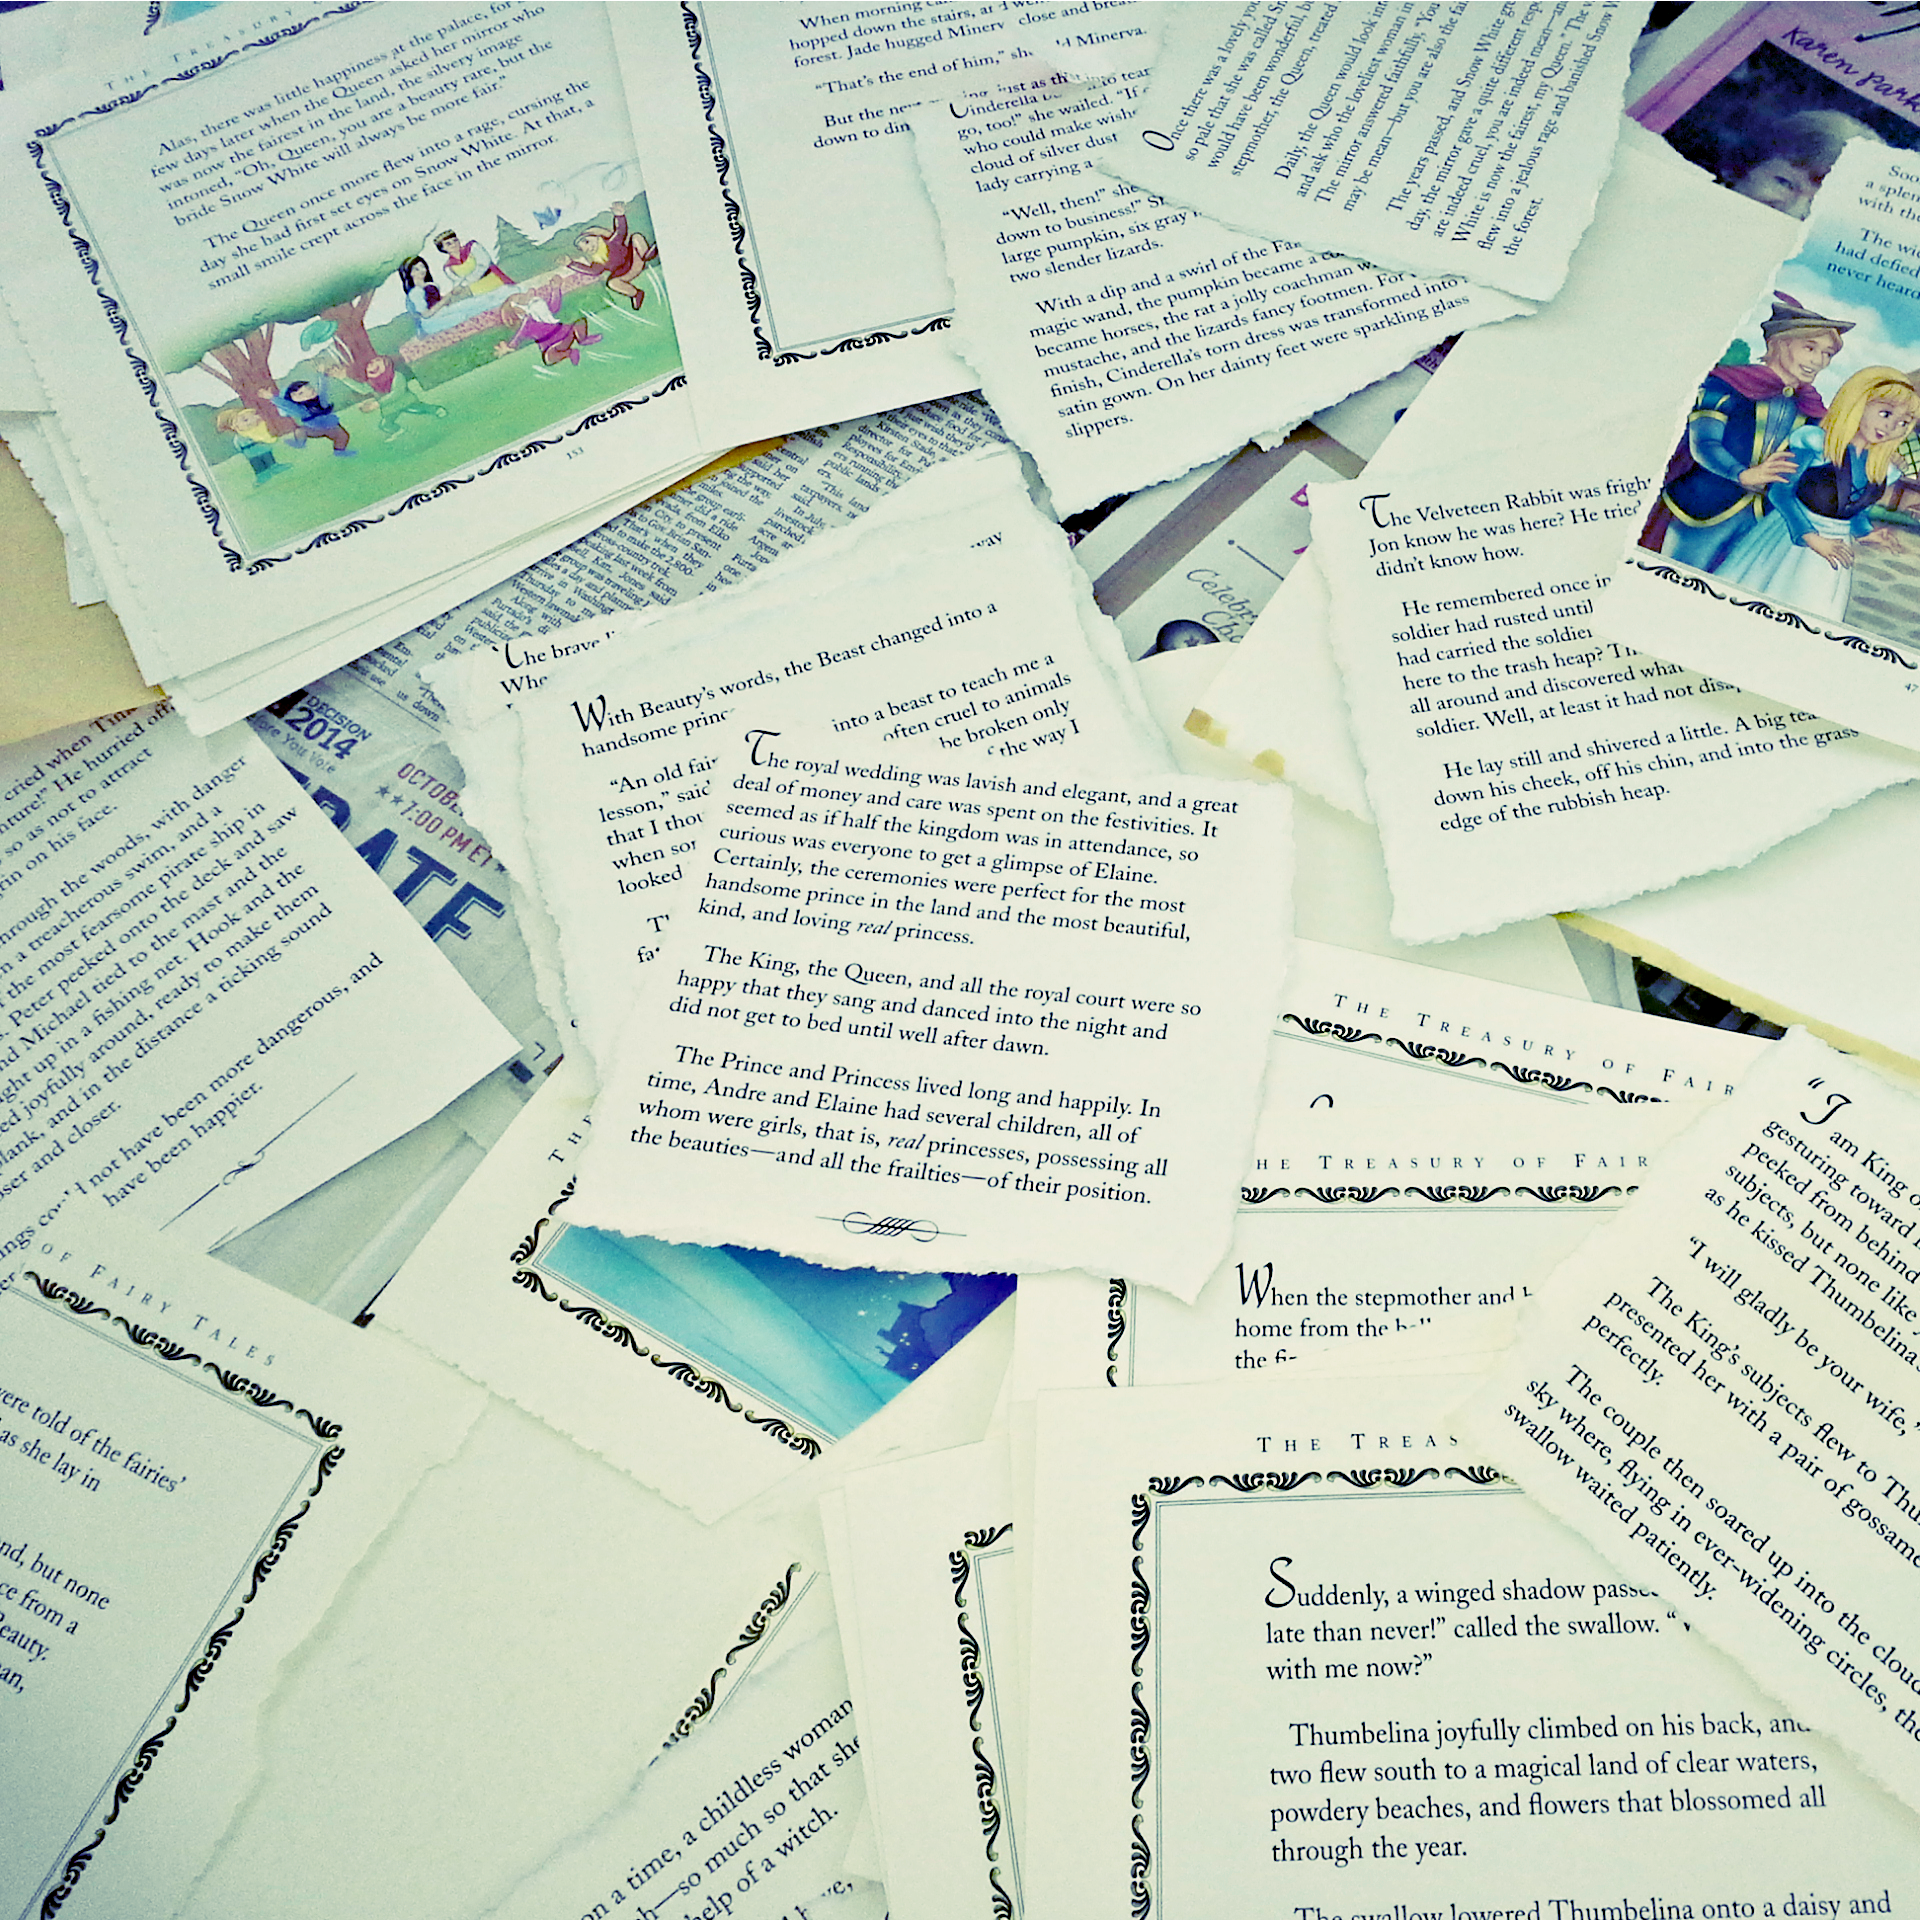
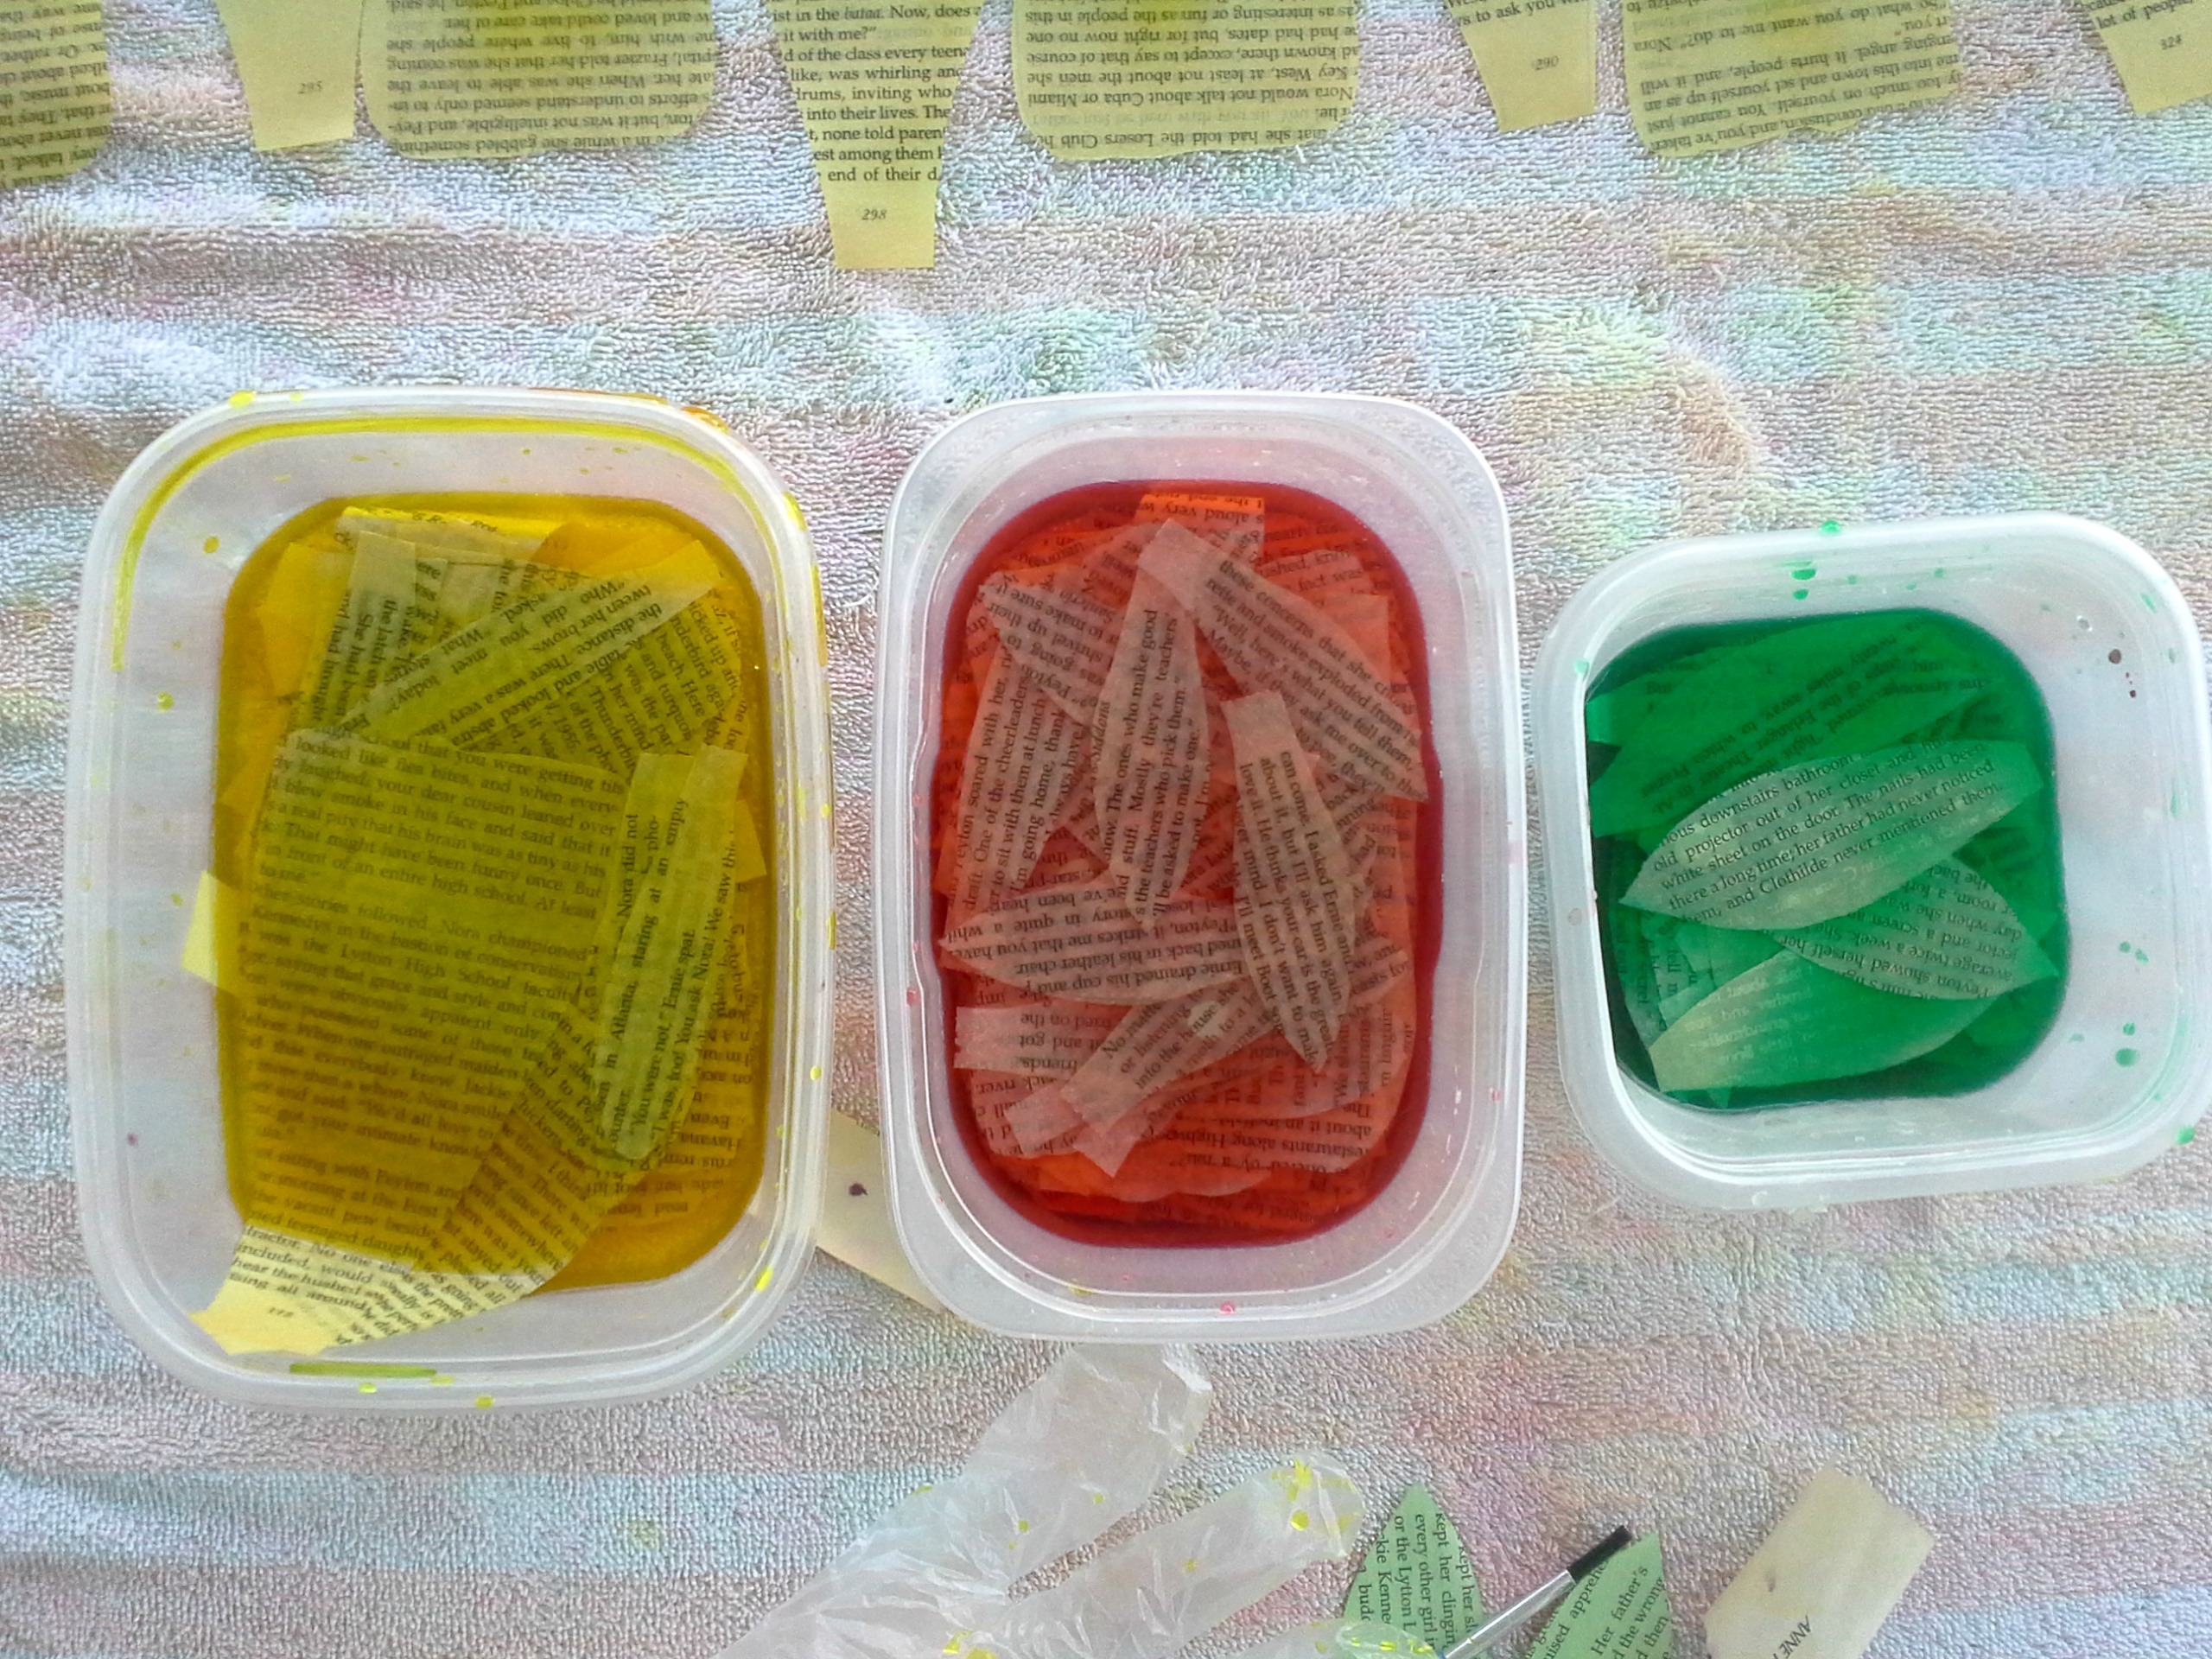
4. Rip or cut up your book pages. Creativity level is up to you. If you’re using a special book, maybe you’ll want to have favorite paragraphs or lines highlighted on your wings. If you’re using a book with small print, it might not make a difference. You can have rough edges, cut pages into scale or feather shapes—go crazy. If you’re in a rush—who cares—just get those pages ready to glue.  (Since I had a large print book of fairy tales and I am a total dork, I artfully tore favorite passages from stories such as The Velveteen Rabbit, Peter Pan, Cinderella, Beauty and the Beast, etc. You don’t have to go through nearly as much trouble.)

5. In a small bowl, pour glue. Add a tiny bit of water to make it easier to spread. (No more than 3 parts glue to 1 part water). Now, using the sponge brush, coat each book page and glue it to the wings–front and back. It’s like decoupage. You can be as creative as you’d like.  Once both sides are covered, let your wings dry for several hours or overnight. (They’ll harden, yet still remahow to make book fairy wings
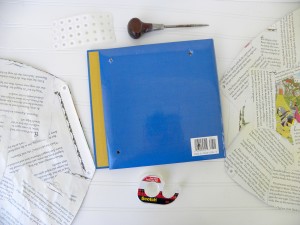
in slightly flexible when dry).

6. Meanwhile… Using your awl or something sharp and pointy, punch four holes in the back of your book cover. Make sure holes go all the way through the back cover only.

7. Have dry wings? Good. Hold them up to the holes you made in the book cover, mark the holes, then punch holes in your wings about 1 inch from the inner edge. (Hole punch does this nicely.) Strengthen the wing holes using reinforcement labels and/or tape.

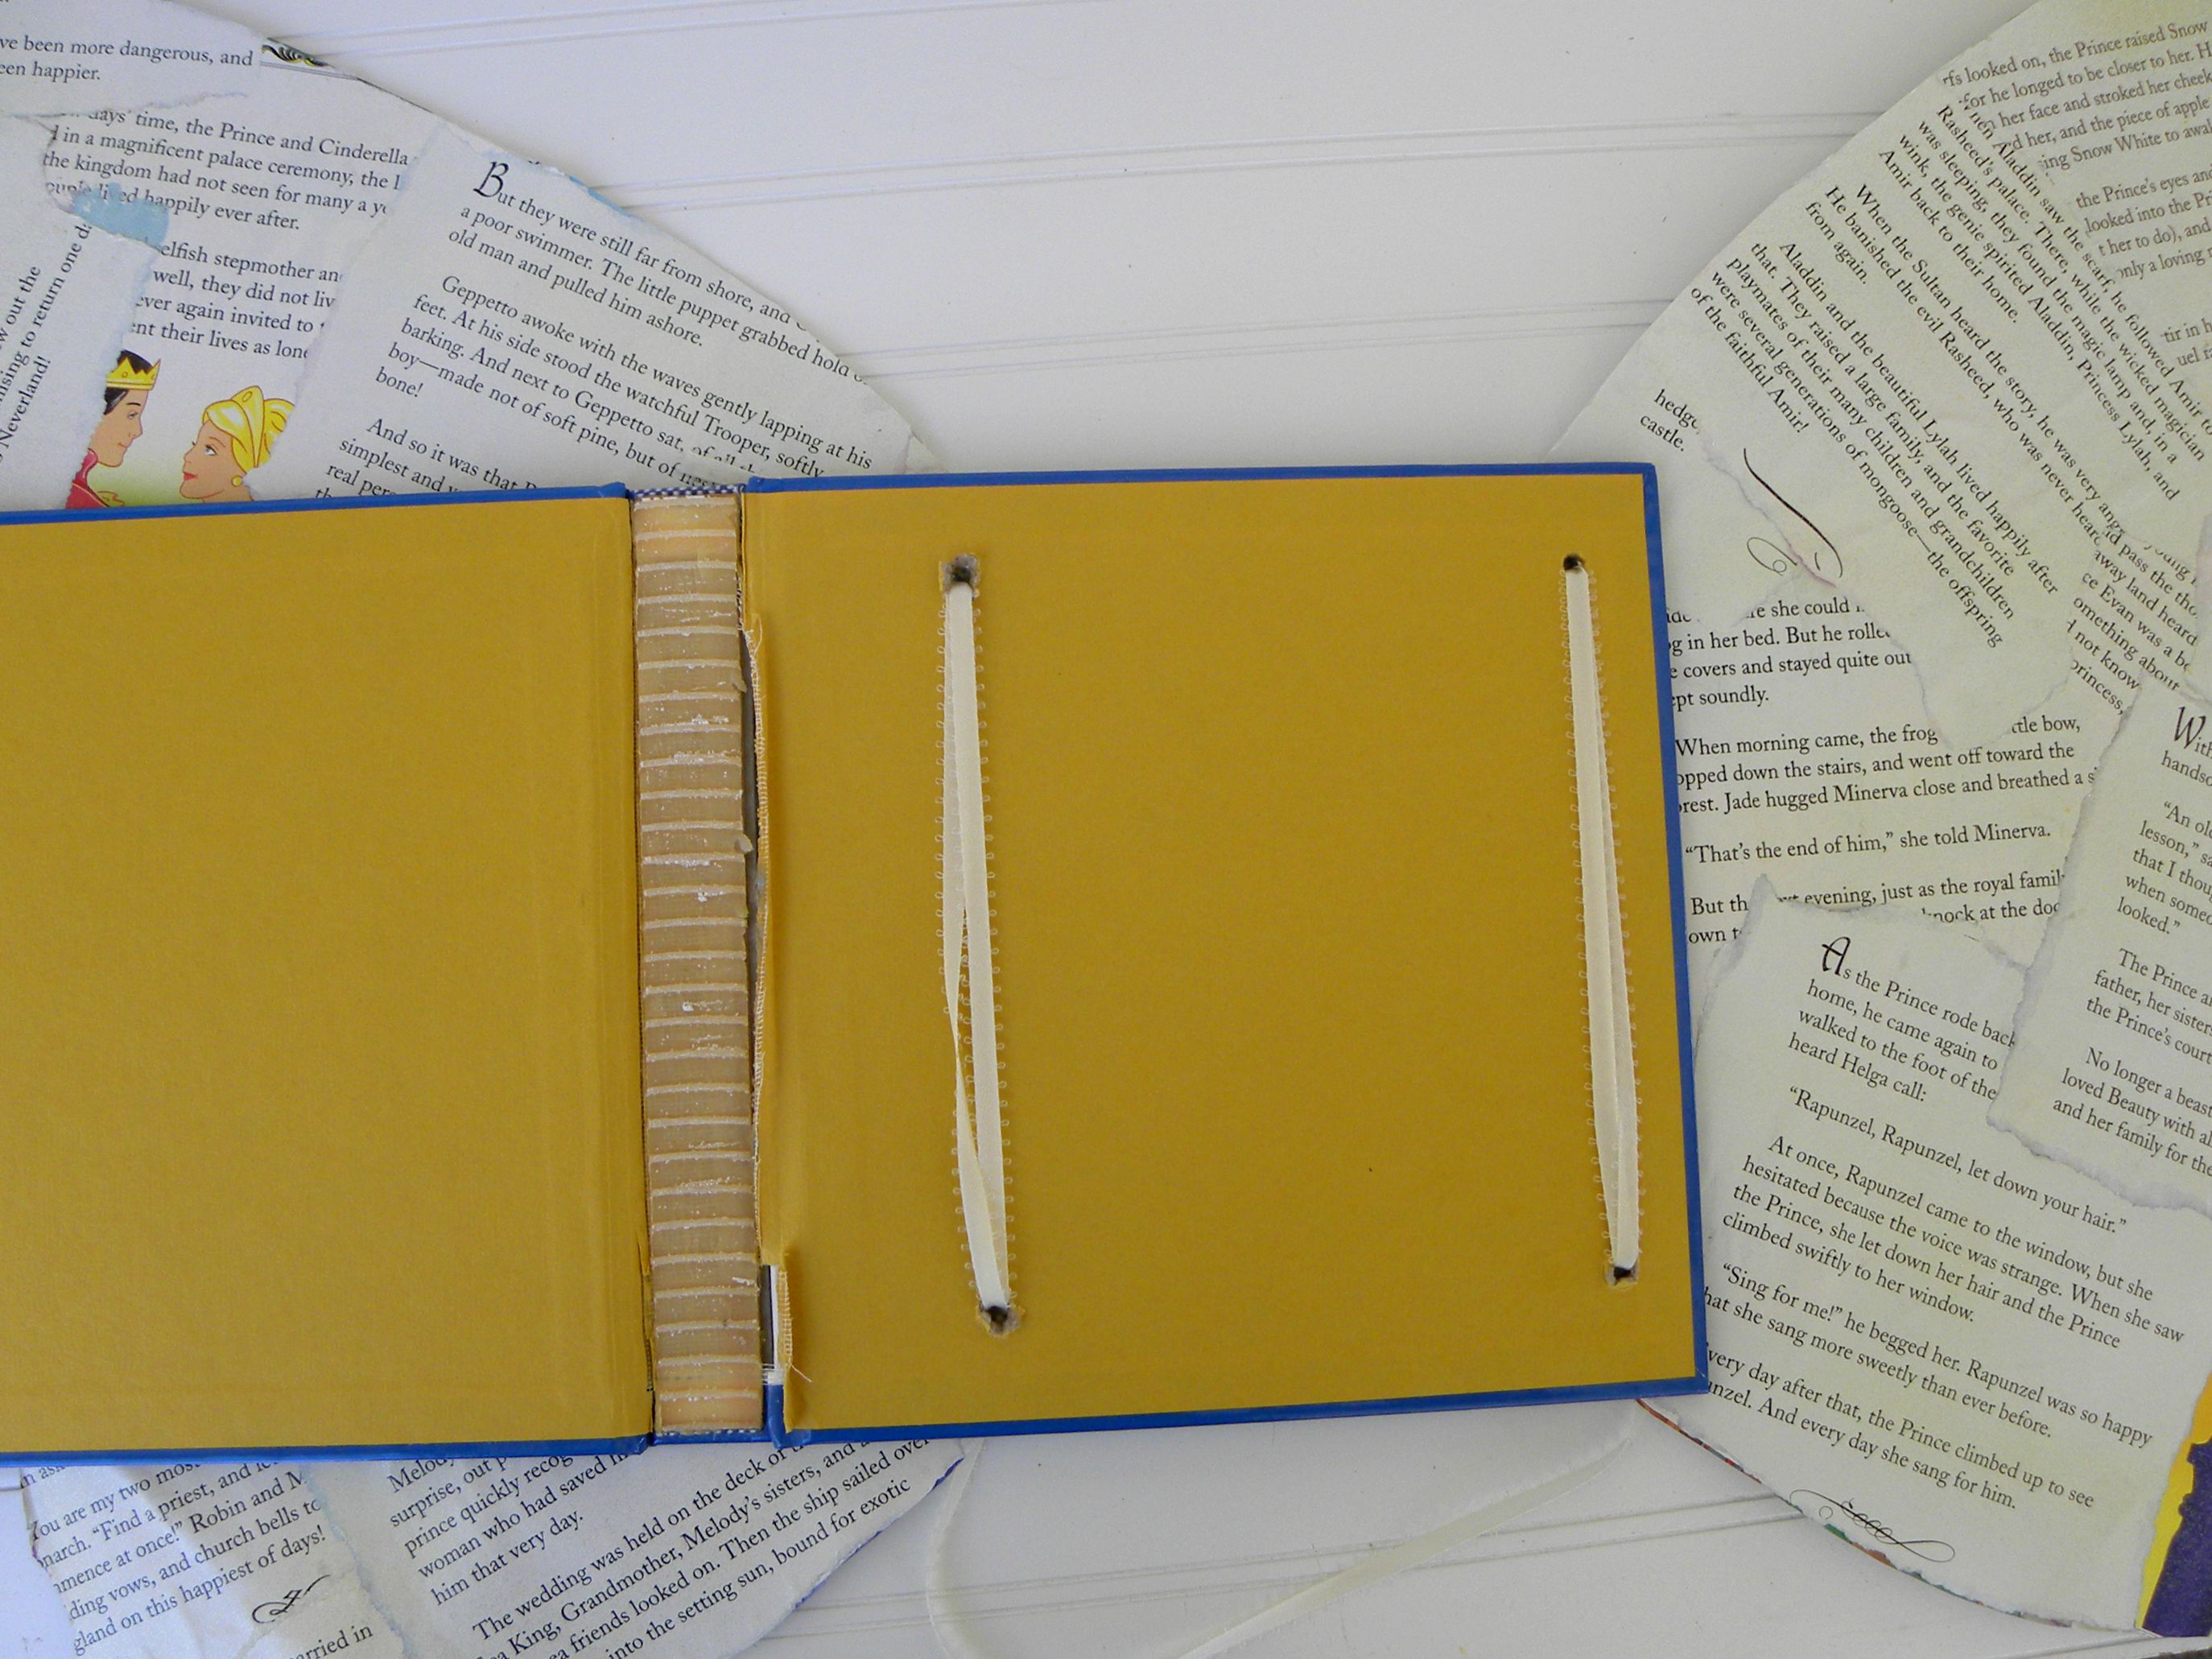
8. Cut about 1.5 yards of ribbon for each wing. (My wing holes were 7 inches apart. If you have a taller book, you’ll need more.)  NOW PAY ATTENTION: the tricky part is coming up! With the inside of the book cover facing you (wings outside), thread about 1 foot of ribbon through the top hole, leaving it dangling outside. (This will be one of your adjustable ties.) Thread the rest through the inside bottom hole. Make a large loop on the outside of your wings (I used 2 feet) and thread it into the top (outside) hole (where you have that 1 foot of ribbon dangling). This will be your arm strap. Still with me? Pull ribbon somewhat snugly inside (but leaving that 2 foot loop outside) and thread end again through bottom hole.

It should now look like this:

inside

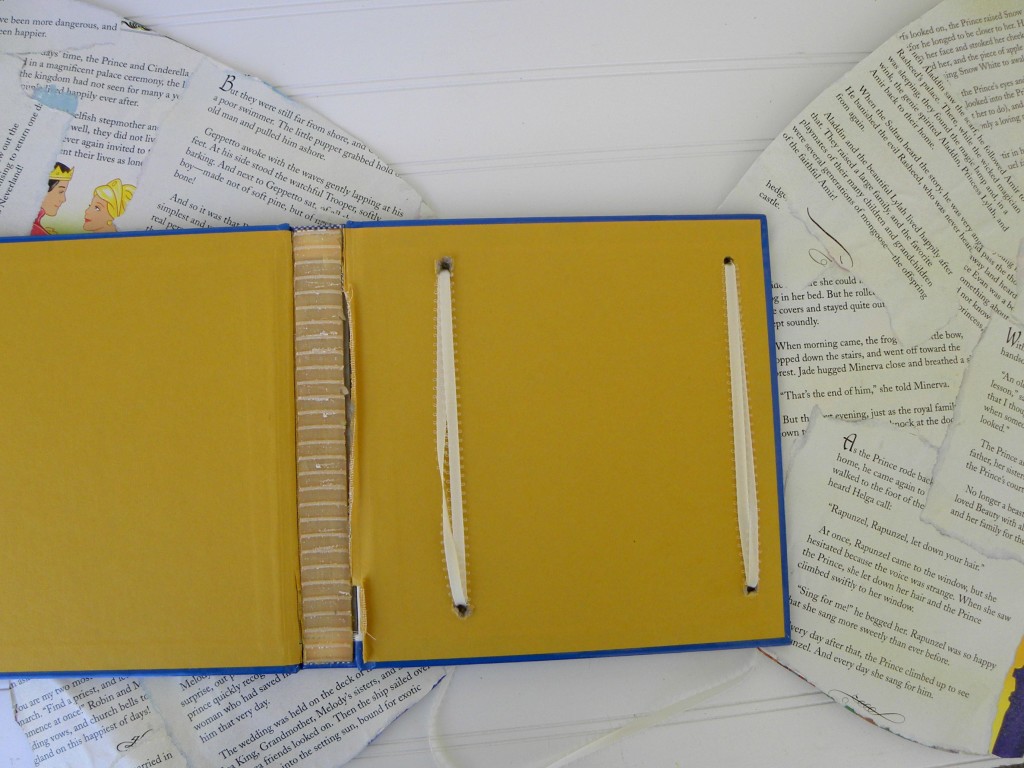
INSIDE with two loops

WING2

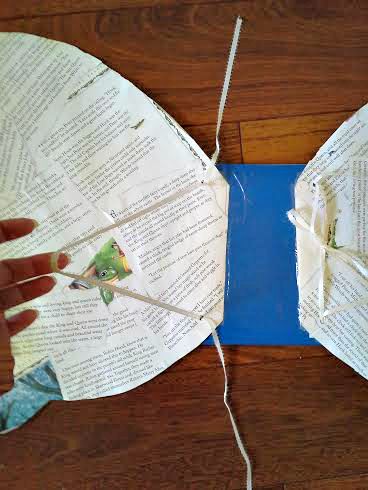
OUTSIDE—two strings to pull to adjust the length of the big loop, a.k.a. shoulder strap

Got that? The purpose of all these loops is to make the shoulder straps adjustable. We’re all different sizes, and if you’re like me and wearing these babies all day, you want to be comfortable.

Now, Tie the strings in a pretty bow (yes, it can be ugly or pathetic—it won’t really show) and test out your wing sizing. Doesn’t have to be perfect, just close.

{NOTE: If your craft-cussing, spatially-challenged hands are a-flapping right now because this seems WAY too complicated, relax. You can always pick your strap size, thread each end into a hole, then tie a nice granny knot and be done with it.}

Yes, the book cover will be flapping open. We’ll take care of that next.

9. GLUE. Glue the covers together. Use good craft glue if you have it. Depending on the inside cover paper type, hot glue may or may not work. (My paper was glossy, so the hot glue didn’t hold.) Make sure no glue goes near your ribbon straps–we want this part to remain adjustable, remember, so limit your glue to around the edges. Now is also a great time to glue your wings to the cover of the book. I used heavy duty craft glue and clear packing tape to secure them.

Let it all dry.

10. Do a final wing sizing. Figure out the rest of your costume. Literary-themed dress or skirt? Fairy-like gossamer gown? Vintage dress?  (I found the dress I’m wearing at a Salvation Army back in college. Think it was a homemade 1970s bridesmaid dress!)  Funky steampunk leather and tights? The options and themes are endless!!!!

You can dress up your wings with glitter or rhinestones, as well. I had bought some metallic gold hairspray, but after reading the warning labels, decided it would destroy/incinerate/permanently discolor my hair. So I sprayed it on my wings, adding a delightful golden patina to the pages. It doesn’t show well in photos, but the subtle sparkle is absolutely perfect!

book wings

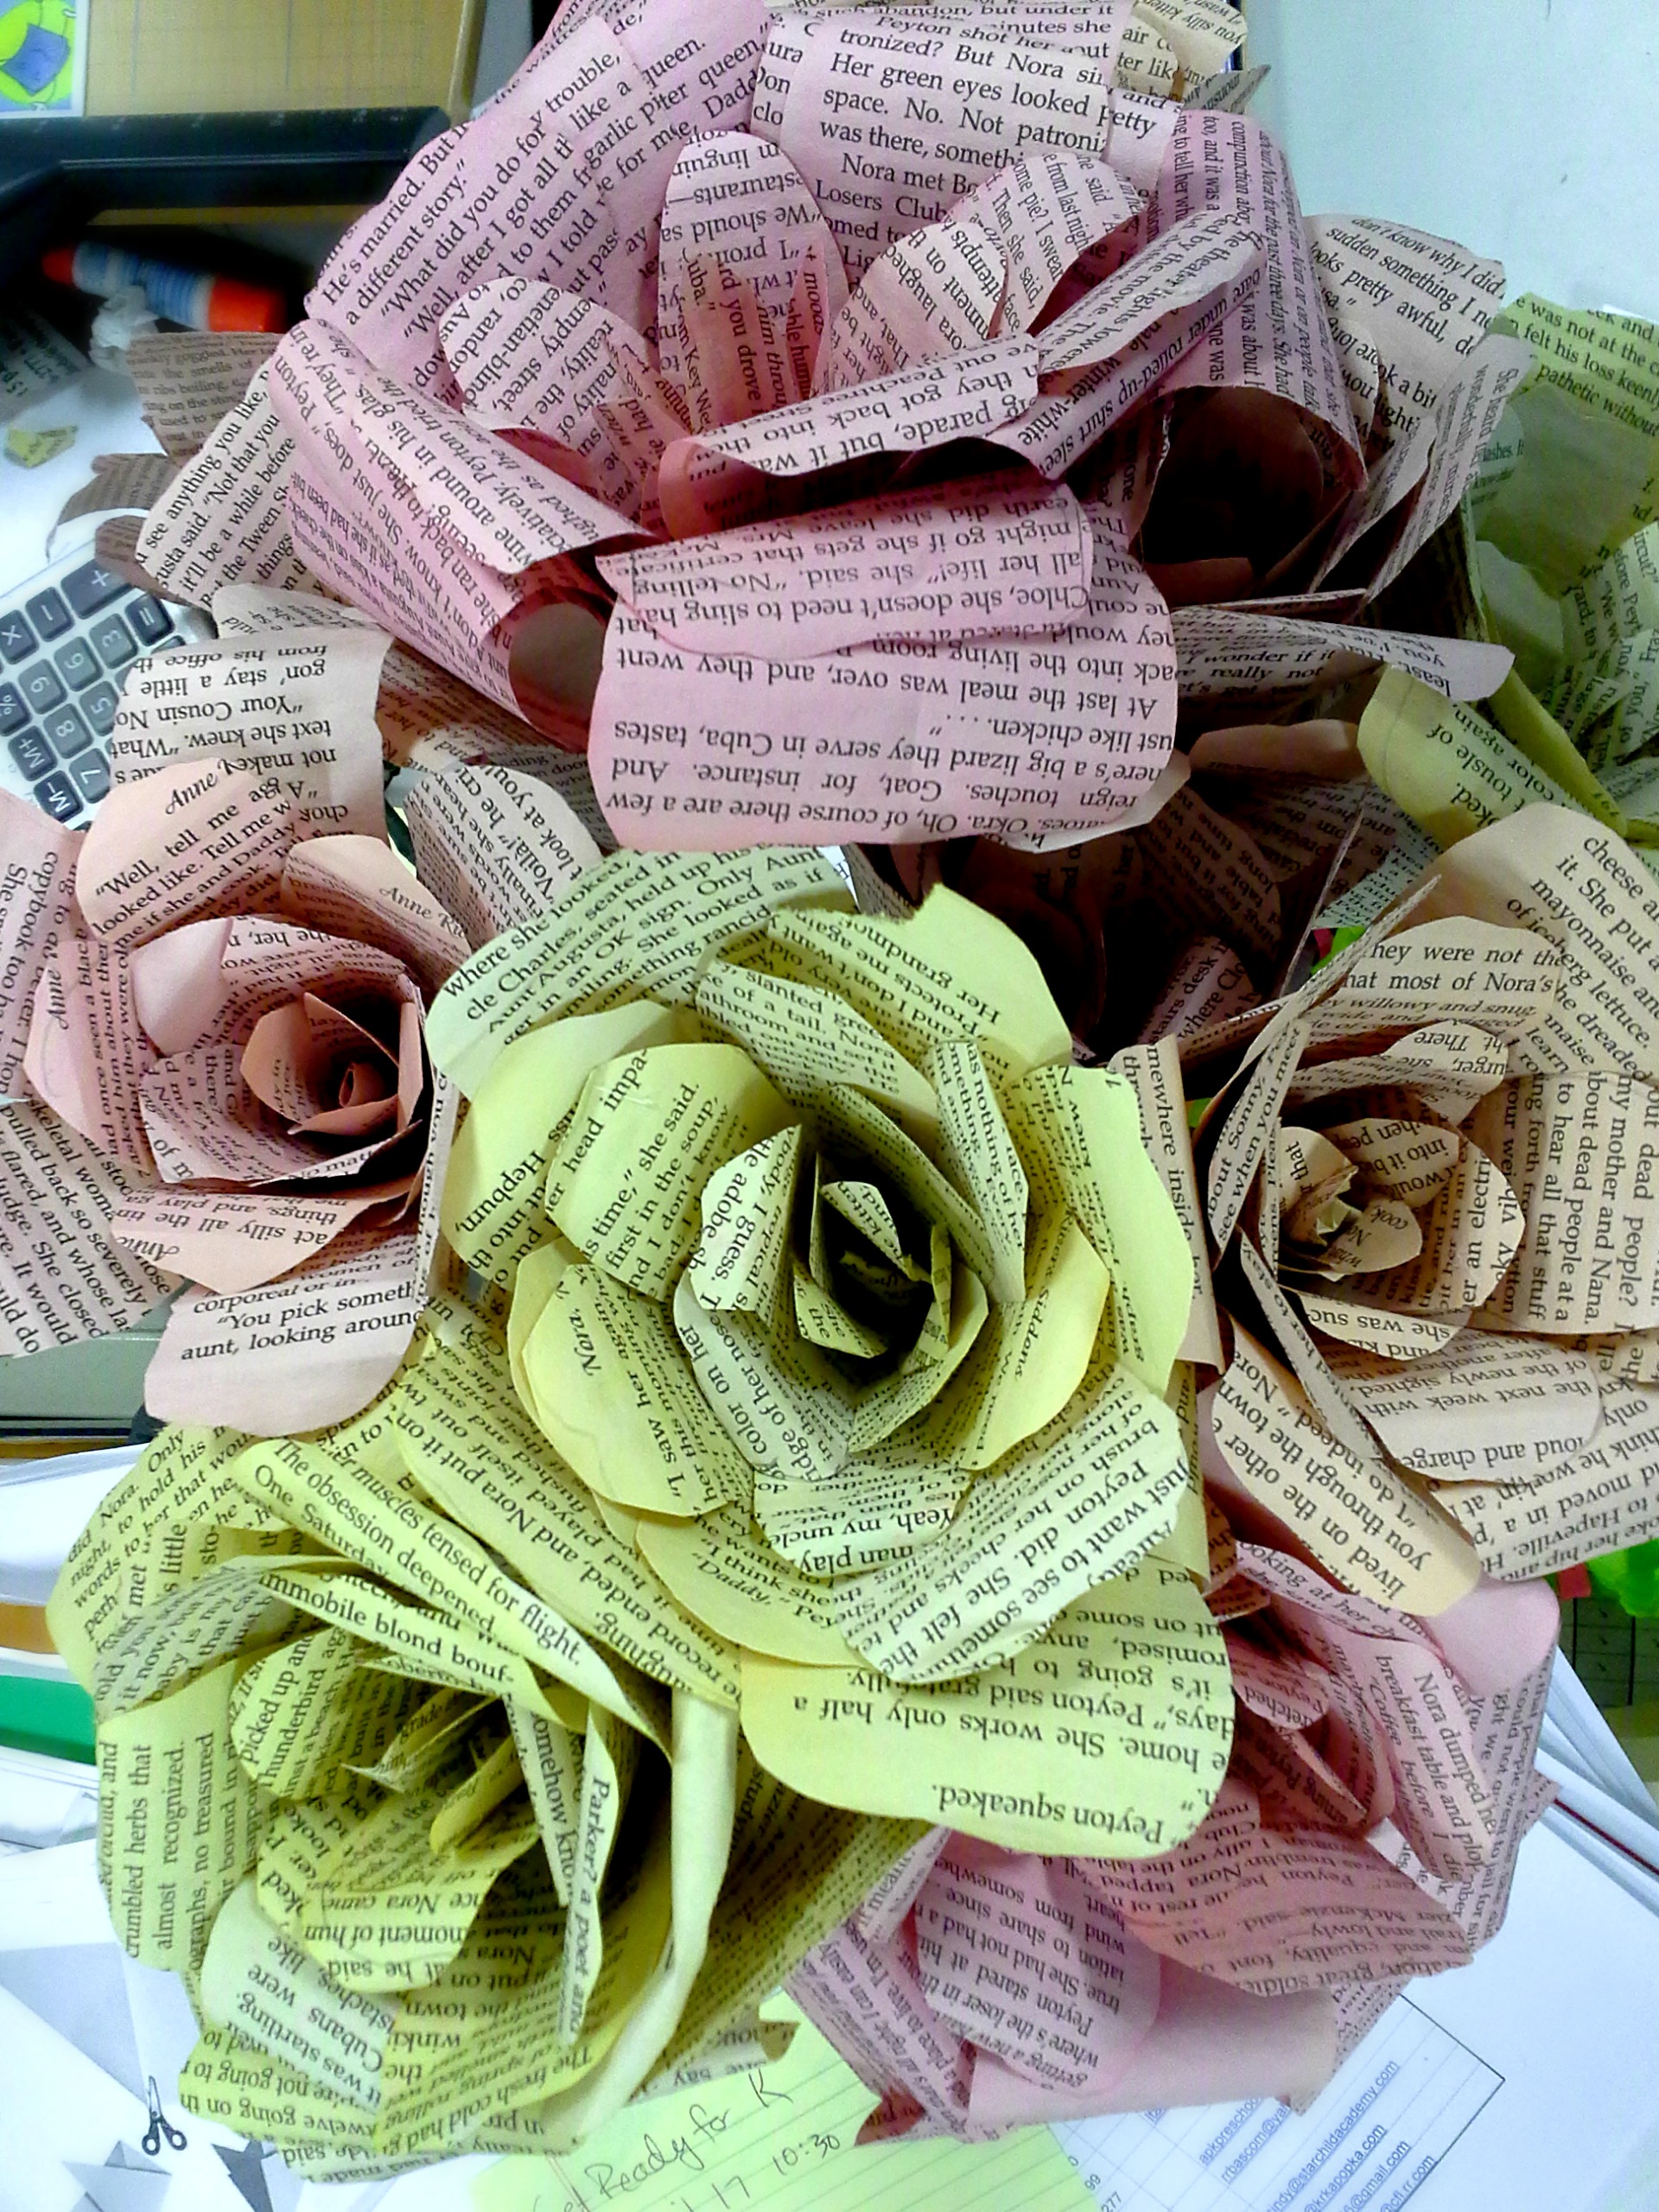
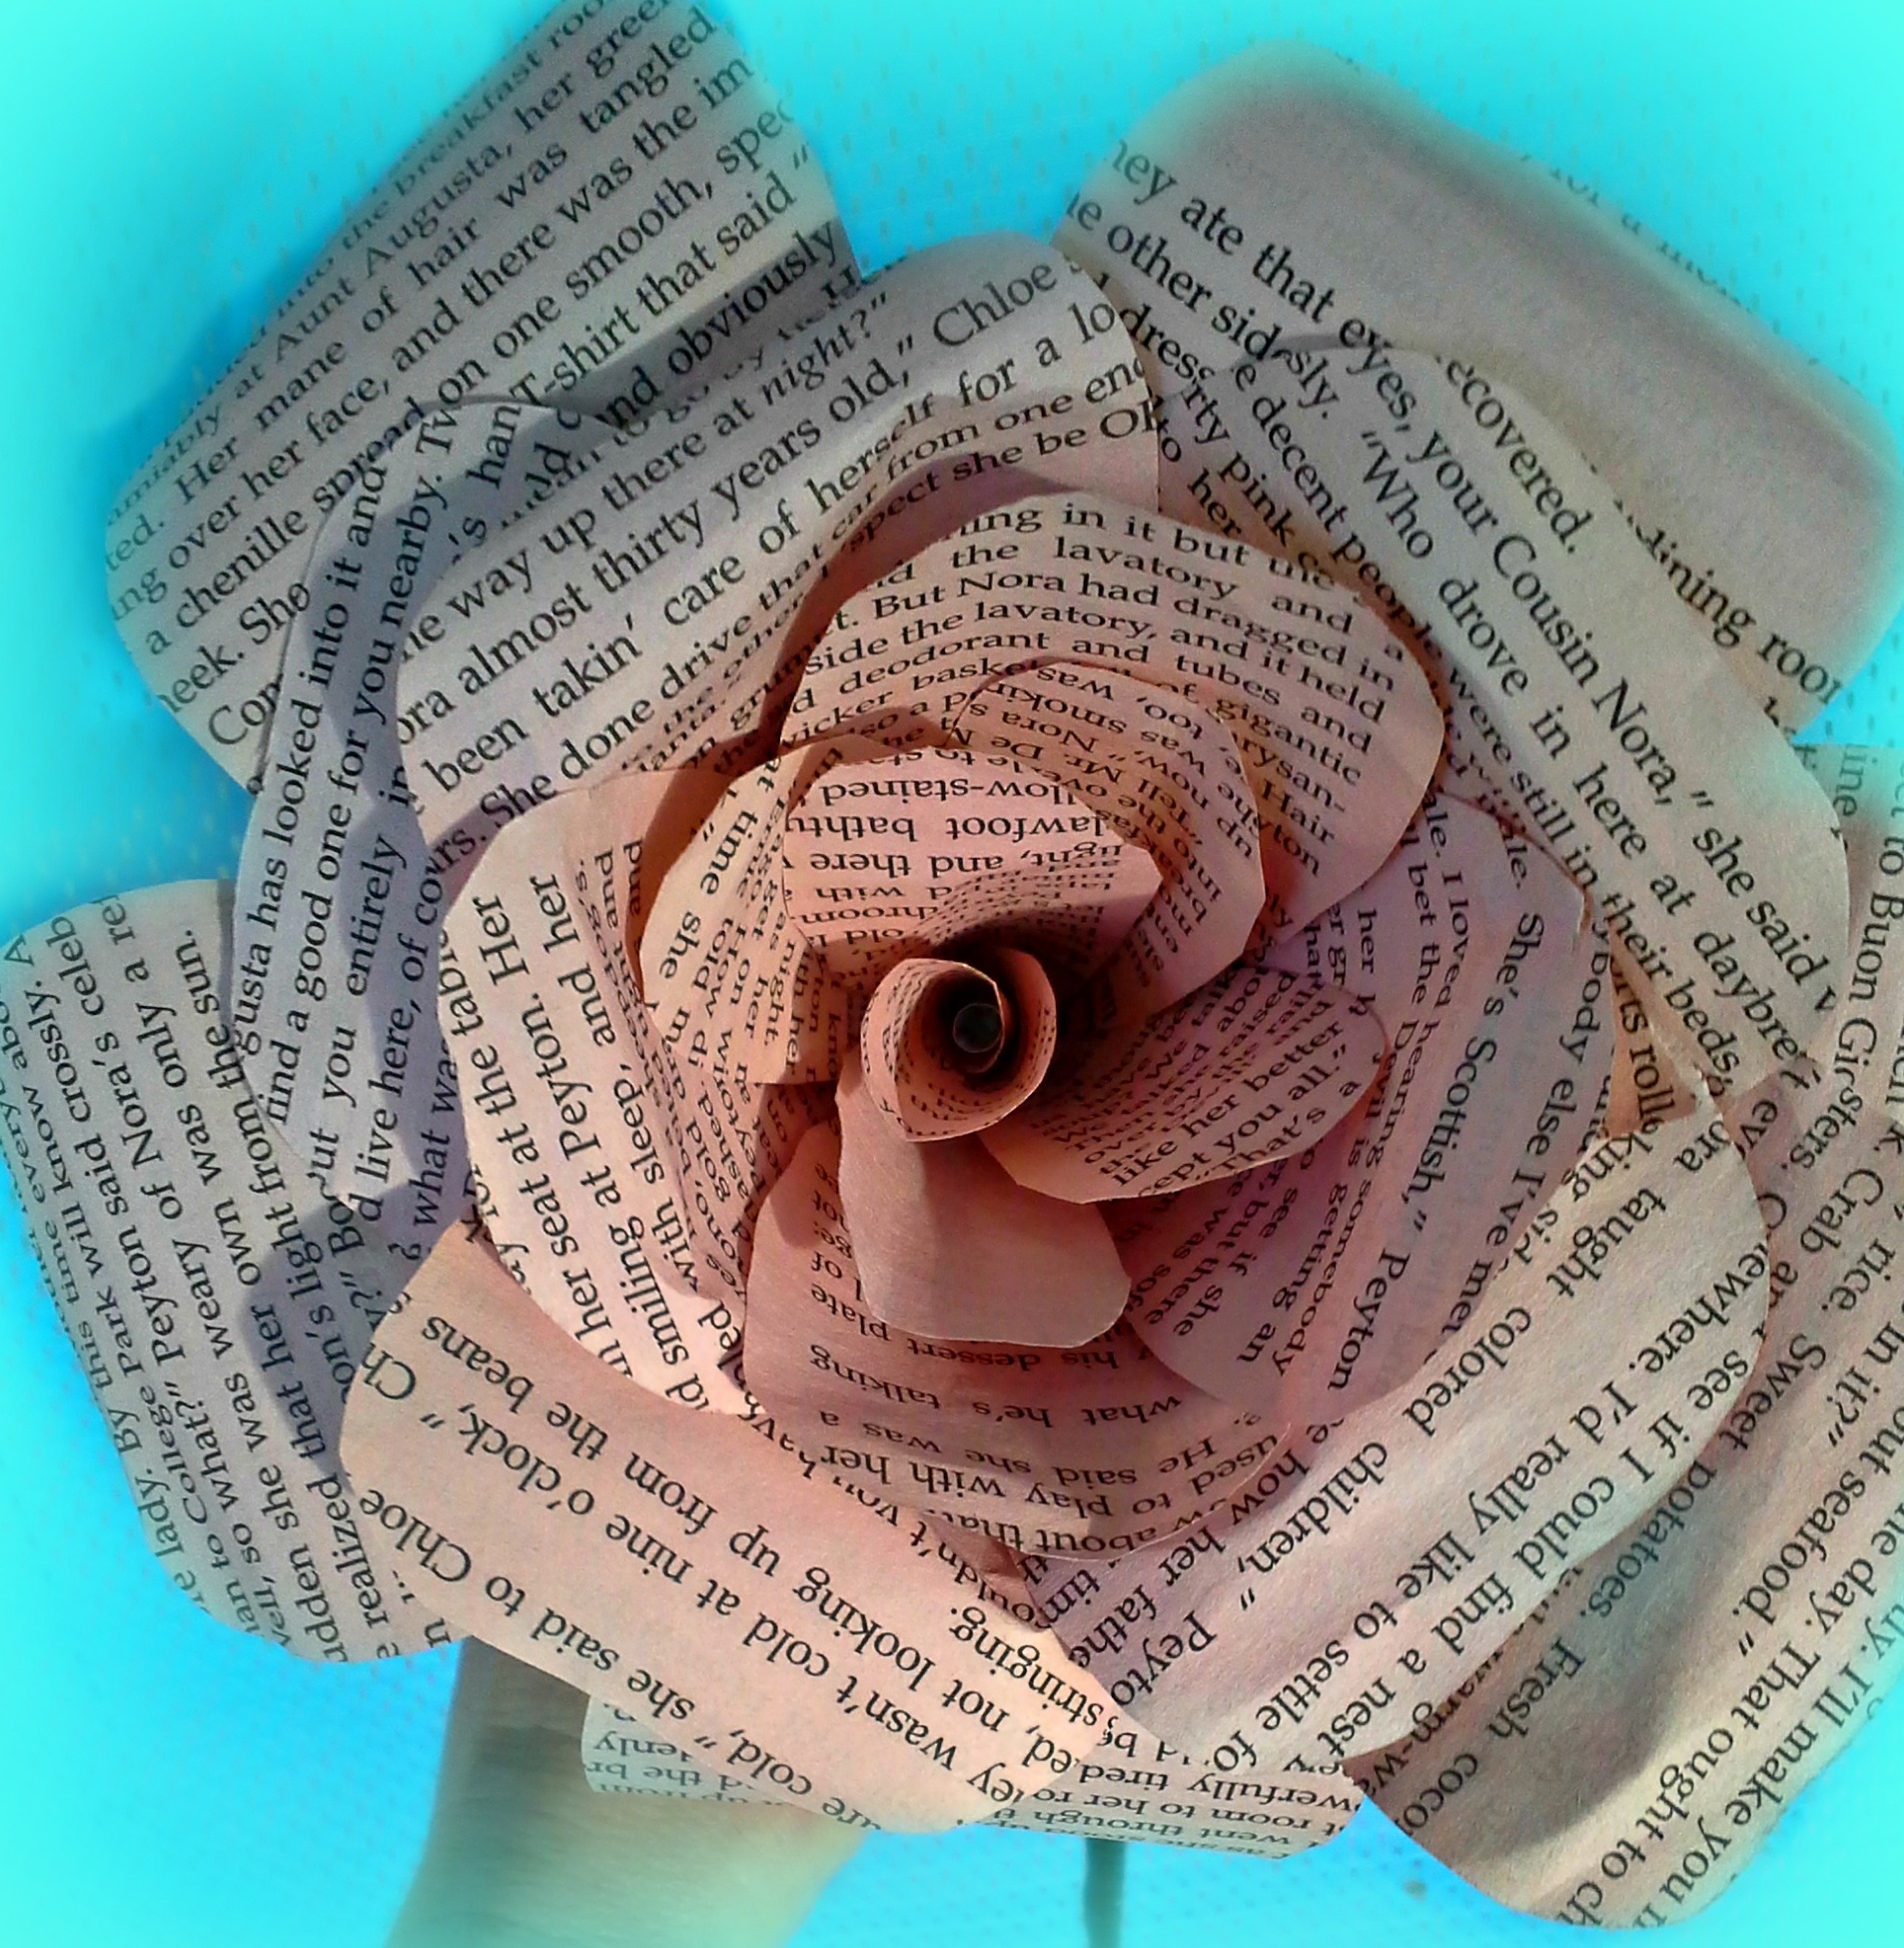
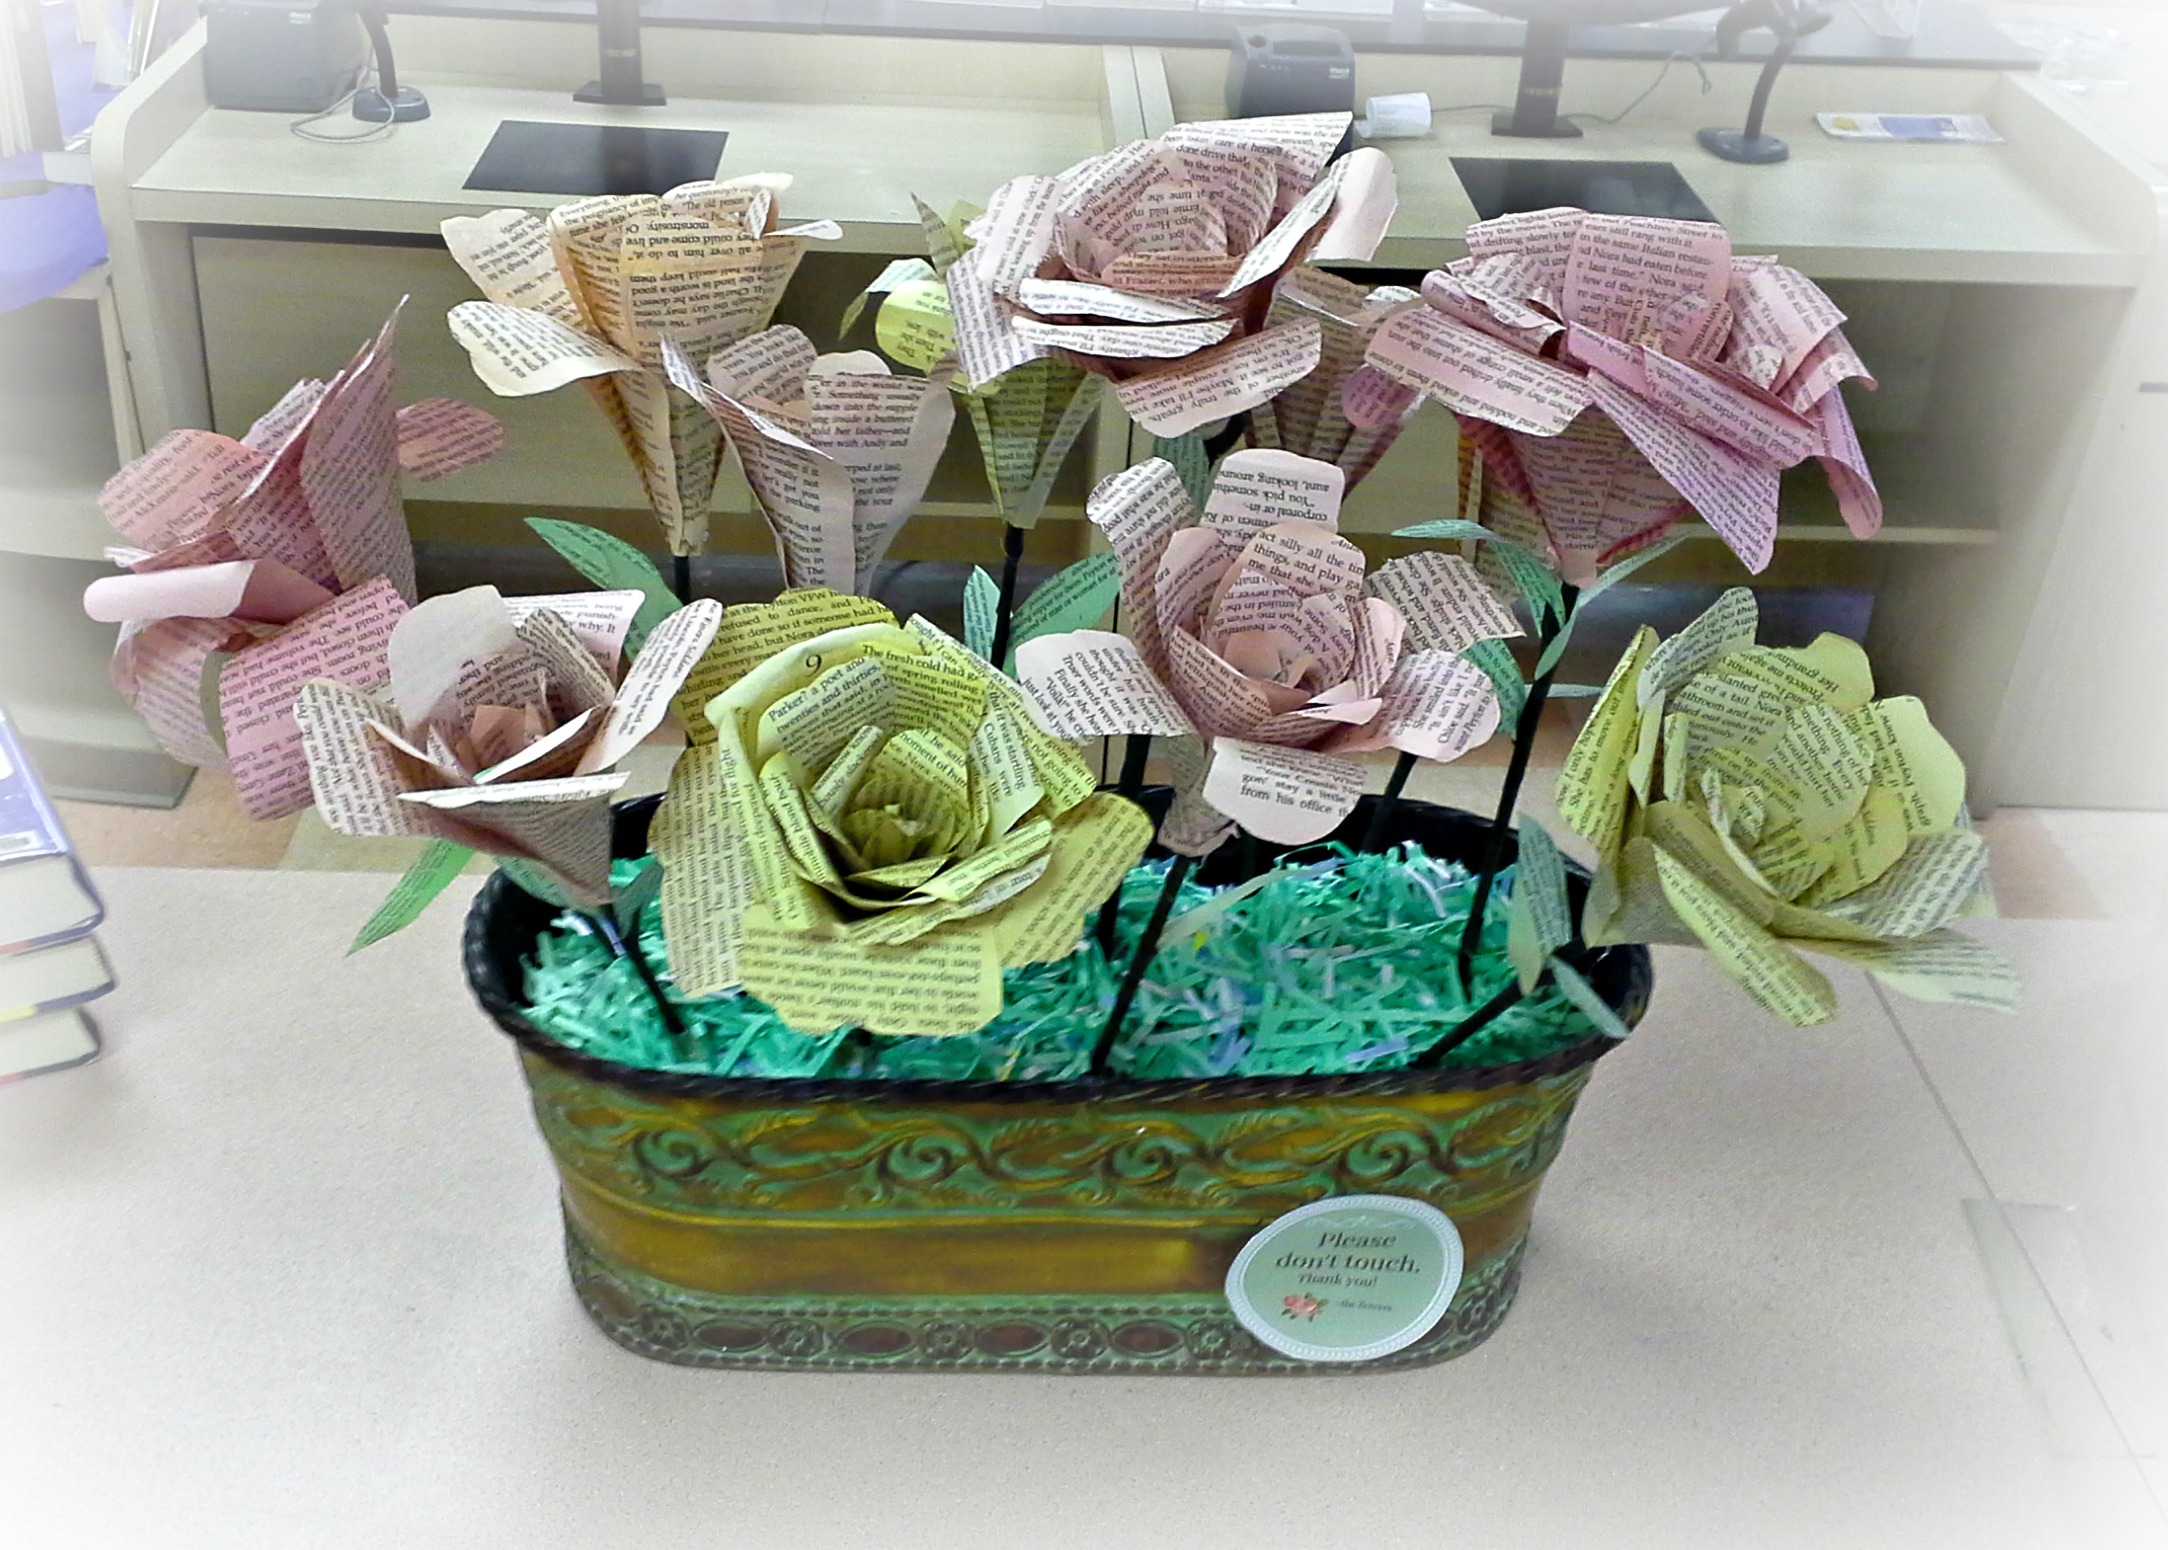
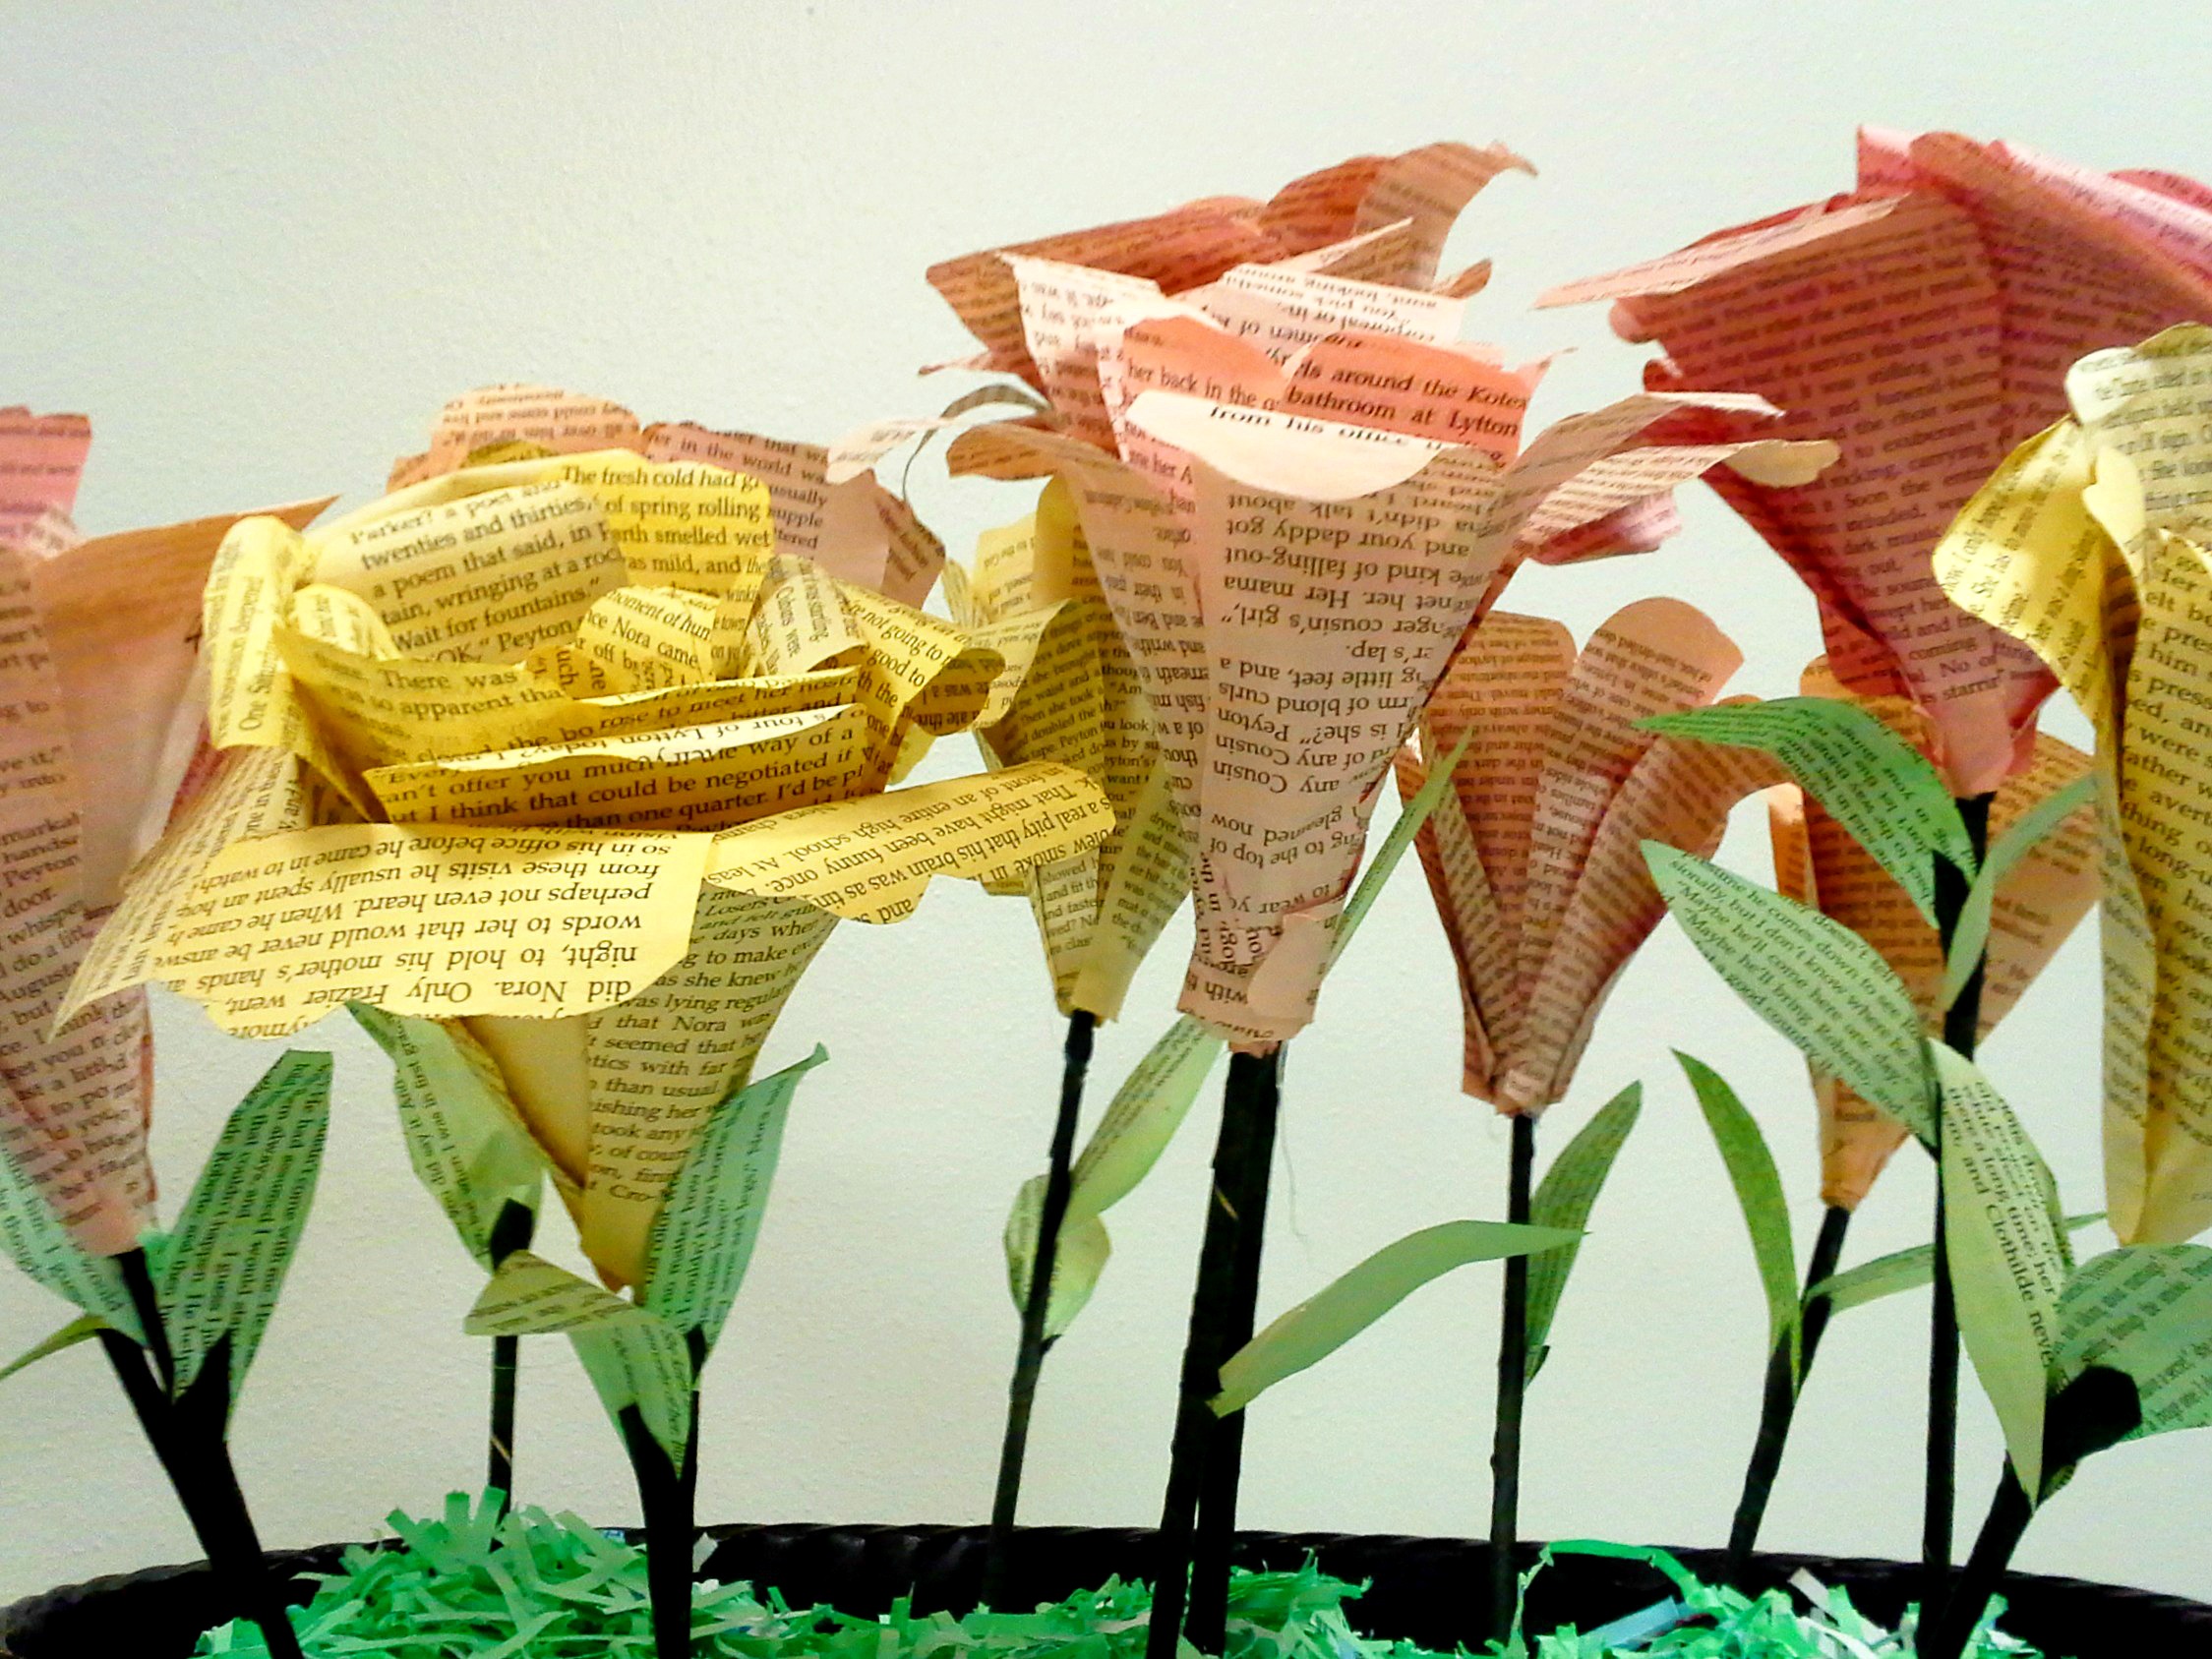
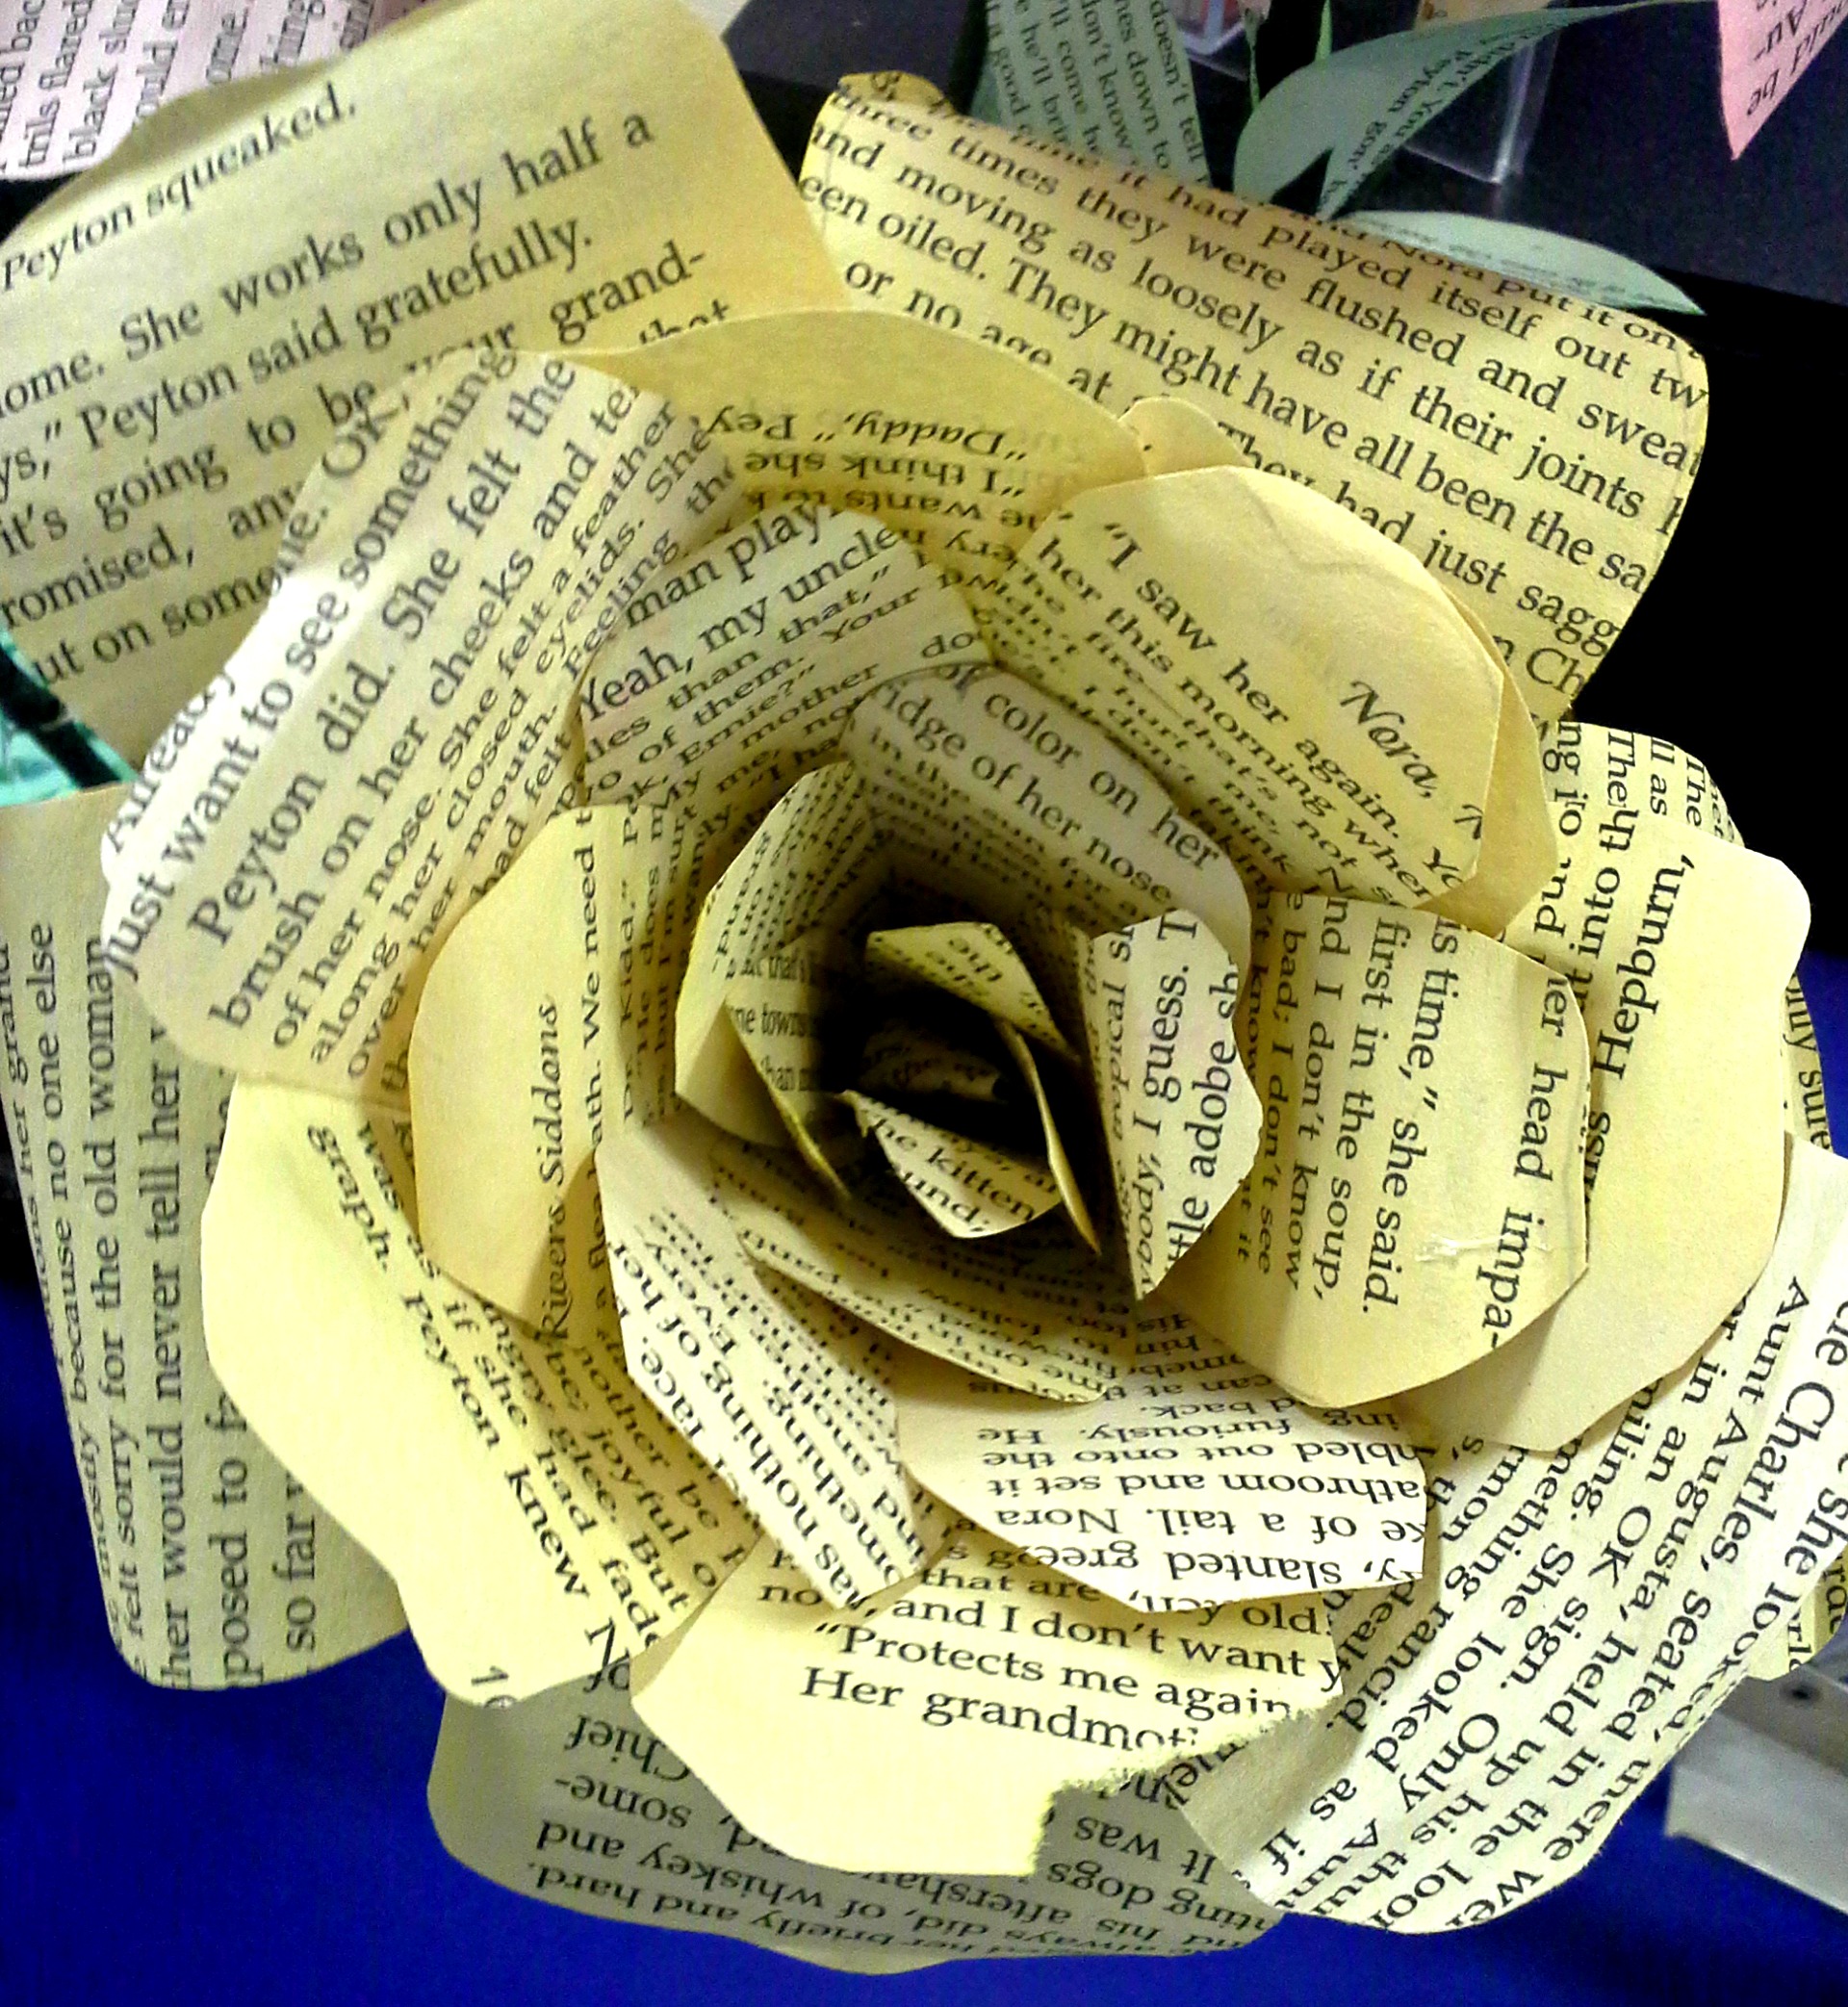
I added a tiara studded with aqua Book Page Roses—love!

Book page tiara--I wish I'd had one of these for my wedding!

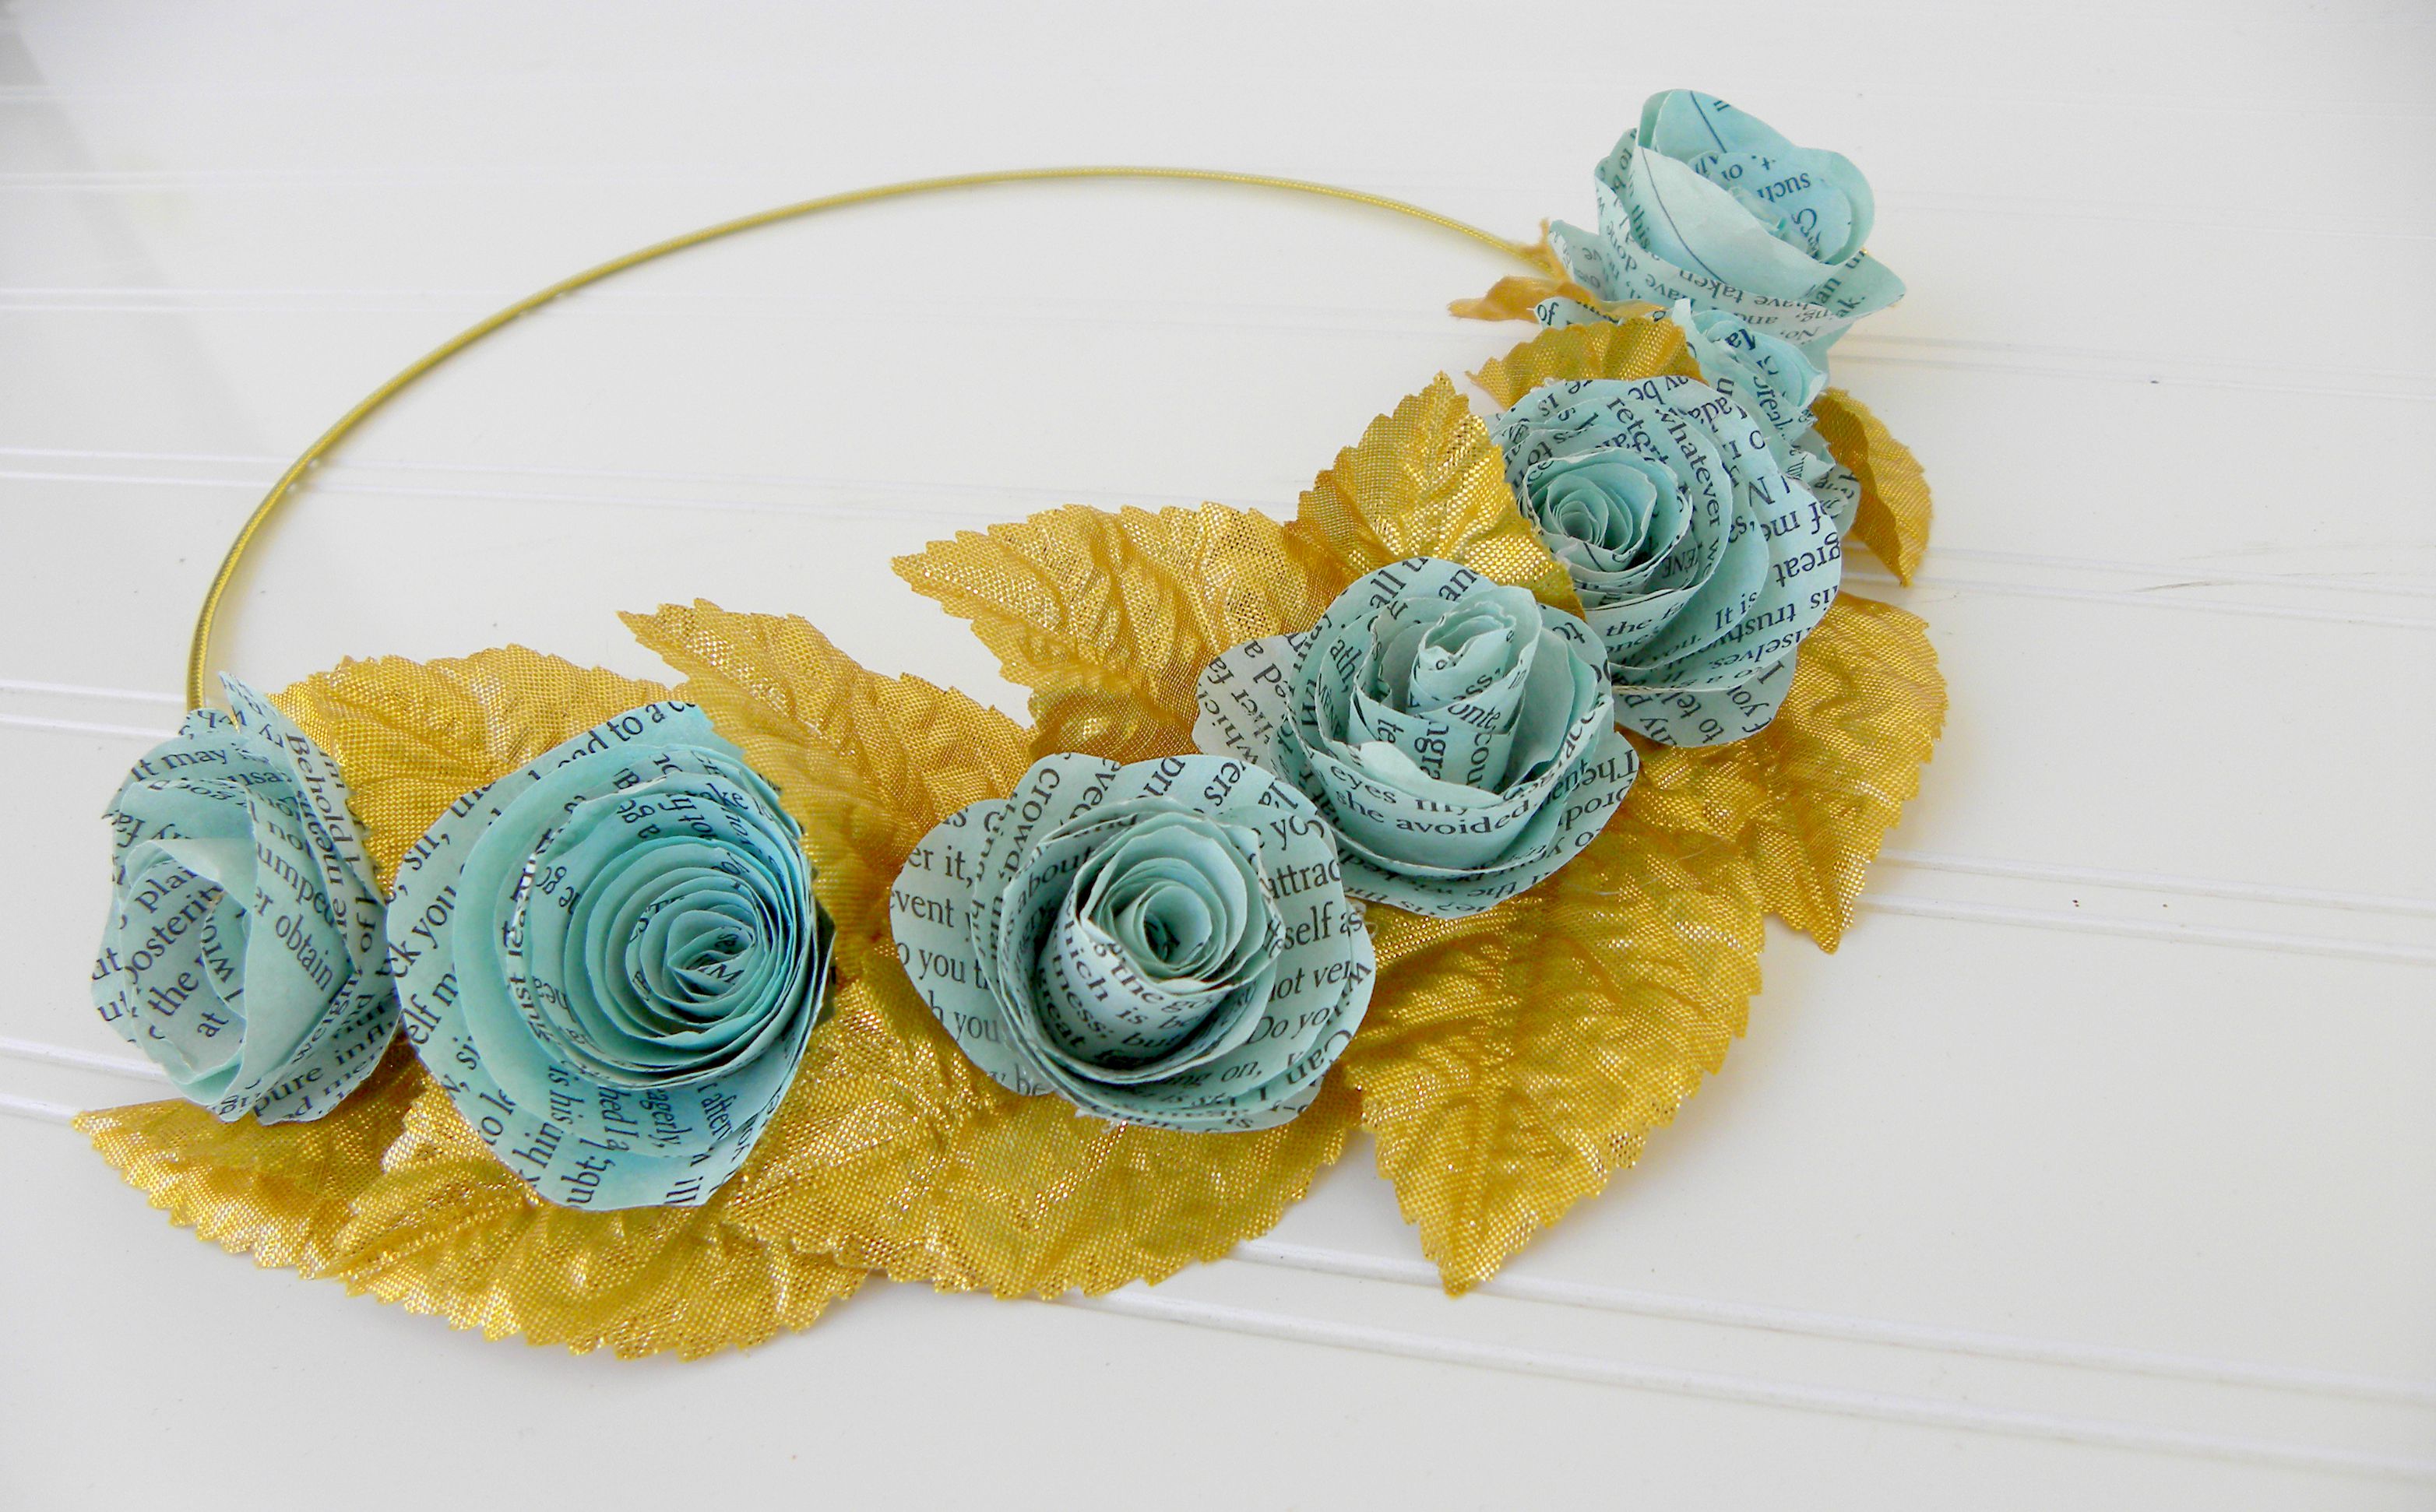
I updated a gold leaf crown from an old Greek goddess costume, adding homemade blue book flower roses. Wish I’d had one of these for my wedding!


Lovely book page flower pendant

wAND

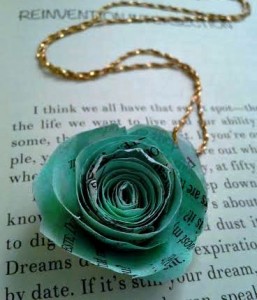
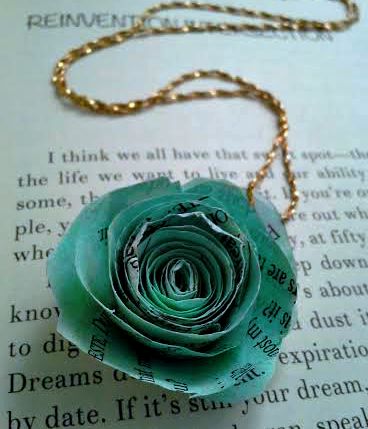
An extra Book Page Rose turned into a delicate pendent.


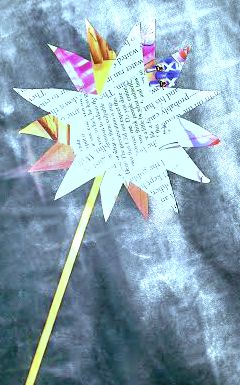
And this cheesy wand I made in less than two minutes.


Have fun! Make it magical! And spread your book love on Halloween!

Perfect Halloween costume for librarians, teachers, and book lovers!

BOOK NERDS—er, FAIRIES—UNITE!

DIY Book Page Flowers


DIY Book Page Flower - how to make this beautiful paper rose bouquet from an old paperback book

Please excuse my messy desk.

Spring is in the air! At least it is here in the Sunshine State, where it climbed to the upper eighties this week. More like summer is fighting it’s sweltering way in already.

The  Frosty the Book Snowman display I created for winter melted in this heat. Since it was such a hit at my library, I challenged myself to create another eye-catching display for the branch. I’d made tiny book flowers for my Book Fairy Halloween costume (check back in the fall for those details). Why not go for big?

DIY BOOK PAGE FLOWERThese book flowers are relatively easy to make, and cost almost nothing. They do take some time to put together. After my first few, I was able to craft one in about ten minutes (minus page dying time).

Spring Library Display - Paper Roses

Supplies:

old paperback book (I used 12 pages per flower)
food coloring
hot glue gun (and many extra sticks–I used almost a whole stick for each)
thin wooden dowels ($1 for pack of 16 at Walmart)
optional: florist tape (Dollar Tree)
old towel & old containers to hold the dye bath

Instructions:

First you need to dye the pages. Wait, first you need to destroy a book. Make sure it’s a novel you enjoyed, and if you’re using it for a public display, make sure it’s not riddled with anything that could be construed as offensive. (Yes, I had to destroy a few petals because swear words were showing. Oops.)  Make it a donated book or a well-loved sample from a used book store, so it will have led a long and productive life. Say a few words honoring the author’s work, give it one last pat, then rip the pages from the spine. It won’t feel it, I promise.

Now onto dying. Add several squirts of food coloring to water in a bowl. Place each page into the dye, pushing it down so it becomes saturated. Layer as many as will fit. The longer you let the pages sit in the bath, the deeper the color. I let some sit for as little as two minutes, while others soaked for hours. The color grows richer over time.

dying paper for flowers

Set the pages to dry on an old towel. Let them dry for several hours or overnight, if possible.

*Note: as you can see from the photo, I cut the petals out first for that particular batch. It really doesn’t matter if you cut before or after you dye.

Once the pages dry, you cut.  Draw five different sized petals on the pages. Hand drawing works best, because like natural petals, you don’t want them to look too perfect. I didn’t want to waste precious book pages so I fit two large on one page and three smaller on another. You need six pages of each. Yes, you can stack them and cut the pages together if your scissors are sharp.

diy paper flowers petal template

*Leaves are optional. If you want them, make them now.

Once the petals are cut out, crease the pages gently down the center so they lay naturally when on the flower.

Now we assemble. Heat up that glue gun. Place a blob of glue on one of the smallest petals and wrap around the tip of the dowel several times so the tip of the stick doesn’t show. Then place glue on the base of each smallest petal and glue them, slightly overlapping around the stick. Go one by one. Continue with each size.

You might want to take a pencil and slightly curl  some of the petals as you go. You don’t want them sticking out straight, but gently opening, like a rose.

large book flowers, side view

All the petals glued? Perfect! Now, if you made leaves, have them handy. Break out that florist tape. I cut three inch strips and glued them to the base of each leaf. Place a dot of glue at the end of your roll of florists tape and adhere it to the stick just below the base of your rose. Now wrap the tape around your stem. Pause to add your leaves, by holding the trailing leaf tape along the stick/stem and wrapping over it. Glue the end.

You’re done! Hopefully you have a glorious paper rose.

large paper flower, diy paper rose

For my library display, I stuck the stems in Styrofoam and covered with shredded green paper. They’d also look stunning in a vase or jar.

My flowers started out as the centerpiece of my Spring Gardening display, but to make to make them stand out, I’ve moved them to their own table. Patrons and staff love them!

Perfect quote for Spring in the library! #library #display #spring #book #quote

**Please excuse the crummy photos. I used my cell phone camera. It stinks.**

Spring gardening library display


What I’ve been doing instead of writing, blogging, reading…

DIY Cork Reindeer

May I introduce my wine cork reindeer herd. Each of these little guys is hand crafted, which means a day full of finger-gluing, pin-stabbing, and craft-store-panic-attack fun.  But they are pretty damn cute.  Consider this my official Christmas photo, because I spent so much time on them, I neglected to photograph my own family. Priorities, you know…

Making Merry—The Library Book Snowman

Frosty the book snowman — a holiday library display

‘Tis the season when the door count dwindles and I have a few spare minutes to play on the job. Everyone seems to be hitting the stores, so libraries aren’t very busy come December. Time to spruce the branch up for the holidays!  Well, minus the spruce…

This being my first official holiday season in our library system, I had to figure out what decorations were permissible. My first idea to make a book tree was nixed due to its religious affiliation, but I discovered that snowmen are totally allowed.  And since it’s Florida, a library full of snowmen might make the 80 degrees outside feel a bit more seasonal…

After perusing Pinterest, I came up with a basic idea how to construct my snowy  bookish guy. Some coworkers doubted Frosty would look like anything but a pyramid of recycled-paper-covered books. I think he looks smashing.


How I made him:

Body: The base uses trade paperbacks while the middle and the head uses regular paperbacks and romance novels. We wrapped the books in recycled flyers and scrap copy paper—I think it would look cool to make white book jackets as well.

Accessories: I found the mother-load of spare snowman parts in the craft closet. Frosty has three buttons on his chest, two buttons for eyes, and a “carrot” nose made from rolled orange construction paper. His hat is made from three small pieces of black craft foam sheets, and I cut his smile from a scrap. Luckily, I dug out a nice wide ribbon to make his scarf, and a coworker grabbed two sticks from outside to make his arms.

A book snowman! Perfect display for libraries and bookstores ;)

Easy-peasy, uses all recycled/reclaimed materials, and free!

Here’s a back view so you can see the way the books are stacked better: Book snowman construction My inspiration: Copy Ream Snowman and Book snowman From the Friends of the New York Mills Public Library in New York Mills, Minnesota.

I just barely had time to create up the children’s area display board. I went with an ELF (the movie) theme:

holiday library board, elf, christmas books, childrens christmas booksInspiration: FromtheShortStacks.blogspot.com

It makes me giggle and crave candy each time I walk by.


DIY Minecraft Creeper Santa Ornament

 DIY MINECRAFT Creeper Santa OrnamentPin It

One of the most important holiday traditions in my family is the annual Christmas tree ornament. Each year, my mom has given me an ornament that celebrates where I am in my life, from beloved Sesame Street characters to college mascots. We do the same for my son now, but finding “cool” ornaments for boys can be challenging after you’ve bought the requisite Star Wars figures, and there are only so many Santas in planes, trains, and automobiles to pick from.

But what is my son (as well as about every other kid from 6 to 16) absolutely obsessed with this year? Why Minecraft, of course.

I couldn’t find a Minecraft ornament in ANY store. I searched online, and the pickings were slender—and extremely pricey. For example, Amazon had only these to offer:

Minecraft Christmas Ornaments Featuring 5 Minecraft Ornaments with Pig, Sheep, Pickaxe, Zombie and Creeper, Ornaments Average 2 1/4 to 3 Inches Tall, Great for a Mini Christmas Tree

This set cost $50!!!!

No way.


Or how about this

Minecraft Legos PICTURE Christmas Ornament  Custom Handmade

Cute, but $22?

Not happening.


Fortunately, I remembered the Pixel Paper Craft  website I’d found via Pinterest two years ago. For my son’s Minecraft birthday cake, I’d printed out Steve, creepers, and a whole menagerie of Minecraft animals—for FREE—from templates on their fabulous site.

Maybe they had something Christmas related?

They did. And they are AWESOME.

minecraft papercraft, minecraft santa, minecraft christmas

And you can easily make your own D.I.Y Minecraft Creeper Ornament, too!

Go to  http://pixelpapercraft.com.
Save then print their free Creeper Santa template. (They also have a more “traditional” Pixelated Santa.)

How to make and easy DIY Minecraft Santa Ornament

Cut out the pattern, fold along the lines, glue the tabs and pieces together, then let the glue dry.
I added a thin red ribbon when I glued on the head, and voila—you have a FREE Creeper Santa Ornament your kids will adore.

It’s not perfect, but it’s homemade with love. And bonus—since it’s made of paper, it’s not breakable.

Every kid that comes to our house is instantly drawn to this Creeper Santa. Though my tree is overstuffed with ornaments of every shape, size, and color, they somehow zero in on this guy within seconds. Their eyes grow wide. And they ask if they can have one, too.

Pintrest HIT.

Easy DIY Minecraft Creeper Santa Ornament | KerryAnnMorgan.com

 Merry Christmas from the Minecraft world!

Looking for Minecraft gifts this holiday season? Check out my Minecraft Book Reviews —kid and librarian approved!

Minecraft Books you kids will LOVE. All these books are librarian and 10-year-old boy approved!mama katCheck out some other Pinetrest Hits with Mama Kat!

Easy DIY MINECRAFT Creeper bag — perfect for Birthday parties or Halloween

DIY Minecraft Creeper Bag - perfect for Birthday parties or Trick-or-treat! Super easy and cheap. #MINECRAFTbag #creepertrick-or-treat

Kids love MINECRAFT. Be it for Halloween or birthday parties, MINECRAFT is the hottest thing going now.

My son wanted a MINECRAFT themed slumber party to celebrate his 11th birthday this year. Since I refuse to do the traditional goodie bags full of junk, I had to come up with something fun, something useful, and something cheap.

Since the party was in October, how about a Creeper Bag? It could be used for everyday activities and as a Halloween trick-or-treat bag. And the kids would think it was pretty cool.

Using a Creeper face template and supplies from my local craft store, I had the materials to make FIVE of these Creeper backpacks for less than $7.50—that’s about $1.50 each! Whoo-hoo!

The kids LOVED them.

Price breakdown: 

Bags: I found “Non-woven Sports Bags” a.k.a. drawstring backpacks at Michael’s for $2 each. After a 40% off coupon, they were only $1.20 each. (find similar on Amazon here and here)

—Paint: $1 at Michael’s, on sale for $0.50 (like this paint on Amazon)

—Brushes: multi-pack at the Dollar Tree for $1

—Cardboard: free from my recycling bin


DIY Minecraft Creeper Bag - perfect for Birthday parties or Trick-or-treat! Now it just so happened that my son received a Minecraft Creeper Box Head as a birthday gift. All I had to do was find a green shirt. (The one in the photos was only temporary. I don’t think Creepers wear Dave Matthews Band concert T’s.) Add in the Creeper bag, and his costume is DONE!

I like using a backpack as a trick-or-treat bag because kids can sling it over their shoulder or wear on their backs. All that candy can weight them down by the end of the night!

He’d gone as MINECRAFT Steve years before with a totally homemade costume (See How-to posts for Steve Head here and MINECRAFT diamond sword and pickax here.)  I have to admit —this year’s Creeper costume was so much easier.

Easy and inexpensive Minecraft Creeper DIY Bag / backpack

MINECRAFT CREEPER Party or Trick-or-Treat Bags/Backpacks

Materials needed:Minecraft Creeper Template

green drawstring backpacks(s)
creeper face template (see below)
black craft paint
cardboard (2 12 x 14-ish pieces per bag)
razor
ruler (optional)
foam brushes

For the adults:

Right click on the template photo on the right and save. Print out as an 8 x 10 (don’t worry, it doesn’t need to be high resolution). Using the template and a pencil, trace the creeper face on one piece of cardboard per bag. With ruler or straight edge, go over the trace marks with a marker or pencil.

Now it’s time to cut. Once again, use the ruler or straight edge as a guide to cut the face out of the cardboard. A razor works best—that way you get clean edges.

Make one cardboard template for each bag. (If you reuse them, paint can smear.)

For the kids:

Okay, the hard part is done. Slide one blank sheet of cardboard inside each backpack to prevent the paint from bleeding through. Lay each bag on a flat surface. Place the cardboard template on each bag (you can tape the cardboard to the bag with masking tape if you wish).

Squeeze some black craft paint onto paper plates or disposable bowls. Have the kids dab paint on their foam brushes and paint inside the creeper faces.

When faces are all filled in, remove template cardboard. Let the bags dry completely before moving or removing inside cardboard. (Our paint dried in about a half hour.)

That’s it!

Happy Birthday, Happy Halloween, enjoy your special day!


homemade minecraft costume, make a steve headminecraft, how to make minecraft sword, minecraft costume


Cranberry Orange Quick Bread

The adults in my family are not big on holiday presents. Most of my relatives don’t “want” anything, and they have no desire to spend days (and a huge chunk of change) tracking down stuff at the mall. We DO enjoy exchanging food gifts—usually homemade (though no judgment is passed if we get a tasty gift basket of treats)—because everyone likes food.

Last year my grandmother decided we all would exchange homemade breads, and a new family tradition was born. I knew most of my usual repertoire would be made by my relatives—pumpkin bread, zucchini bread, banana bread. . .  I searched for a unique recipe I knew no one else would make.

Our neighbor’s tangerine tree hangs over our yard.  We usually zest our small harvest so we can make Tangerinecello—our Florida a variation on the Italian Limoncello. (check out those recipes here and here!) I searched for a way to incorporate our home-grown sweet citrus.

Orange —> tangerine + Christmas. . . how about some Cranberry Orange Bread?

Great gifting: Easy Cranberry Orange Quick Bread. My friends and relatives insist I make this for them each year!

I fell in love with these paper trays and bags. I think they were from the Martha Stewart line, found last year at Michael’s (1/2 off, of course!) They made my breads look totally gift-worthy!

The bread was a total hit.

It’s rich, reminding me more of a light pound cake than the usual quick bread (must be all that butter).  I could devour it for dessert. (Ooh, with a touch of ice cream on top I’d be in heaven!)  Or you could whip up a quick glaze—I didn’t because my little breads had to travel.

It’s pretty easy, slightly decadent, and totally gift-worthy. Not to mention rather festive looking, and perfect for Christmas brunch or breakfast.

cranberry orang quick bread

2 cups all-purpose flour
3/4 cup sugar
1 1/2 teaspoons baking powder
3/4 teaspoon salt
1/2 teaspoon baking soda
1/4 cup butter, softened
1 tablespoon orange (or tangerine) zest
3/4 cup orange (or tangerine) juice
1 egg
1 cup cranberries (fresh or frozen)
  • Grease/spray bottom of a 8×4 or 9×5 loaf pan (skip if you’re using paper baking pans).
  • Mix flour, sugar, baking powder, salt, and baking soda. Add butter (I like to chop it into bits) and mix until good and crumbly.
  • Add zest, juice, and egg; stir until moistened. Fold in cranberries.
  • Pour batter (it will be thick) into pan and bake until a knife comes clean from the center.
  • For a 8″ loaf, about 75 min; for a 9″ loaf, about 55-65 min at 350F (watch after about 50 min, depending on your oven).
  • Loosen sides from pan, remove, and cool completely.

*Optional GLAZE*

Mix 1 Tbsp. orange juice, 1 cup sifted powdered sugar, and enough extra orange juice to get it to a “drizzly” consistency. When cake bread is completely cool, drizzle over top.


Cheers and enjoy!


Mama's Losin' It


I’m linking this holiday tradition up with Mama Kat. Drop by and see her!

How to make MINECRAFT Diamond Sword and Diamond Pickaxe

minecraft, how to make minecraft sword, minecraft costumePin It

Maybe you kid has his/her heart set on being a Minecraft character for Halloween. Or perhaps you’re planning a Minecraft-themed party or just want some props for your kids to play with. It seems like all elementary-aged kids are totally obsessed with Minecraft now, and the cost of the goods proves just how popular the game is now.

My kiddo decided he wanted to be Steve for Halloween. The  Minecraft: Steve Cardboard Head (just a cardboard box printed with squares) sells for upwards of $25. I figured out how to make my own (see super-easy step-by-step instructions here).

But what about the sword and pickaxe?

My kiddo wanted not just any sword and pickaxe, but the diamond versions. (Something about invincibility? I can’t keep up with  all the Mineraft lore.)

They sell on Amazon for around $40 – $50. EACH. Not happening. *Edited 10/14—they used to sell for 40-50 bucks. They’re now down to about $20.* (Seriously—I do not lie: Minecraft Blue Diamond Sword, Minecraft Blue Diamond Pickaxe)

Time to get creative and make my own.

FPXFGames provides printouts you can download to make 3D folded paper swords and pickaxes. My kid would destroy a paper version in minutes. I created images to print and glue to foam core instead.

How to Make Minecraft Diamond Sword and Pickaxe

You’ll need:

Printed images
utility knife/razor
1 20 x 28″ piece foam core board (paper coated, not craft foam)
spray adhesive or glue stick
straight edge (metal ruler or L-square)

diamond sword minecraft diamond sword handle Minecraft-pickaxe-template

  1. Download these images. The sword comes on two pages here and here, the pickaxe one here.
    Minecraft-pickaxe-template pdf
    diamond sword template 1 pdf
    minecraft diamond sword 2 pdf
  2. Print. They should print on 11″ x 17″ paper. For best results (or unless you have an amazing printer) I’d recommend printing at a copy shop. (The shiny paper and high-quality ink looks much better!)how to make minecraft diamond sword and pickax
  3. Cut out around (roughly, you don’t need to be precise now) one copy of each so they will fit onto the foam board. Lay out the three  pieces of the sword together. Spray each piece of paper with spray adhesive or smear with glue stick (making sure you glue well around all edges. Rearrange onto board, smooth, and press to ensure a good bond.how to make minecraft diamond sword
  4. Now it’s time to cut it out. Again, I roughly cut out each item so it was easier to work with. Using a utility knife or razor and a straight edge, cut out each piece. The knife must go cleanly through the foam, so don’t do it on top of your dining room table–garage floors work great. Make sure you press firmly so the foam cuts evenly.
  5. Once the pickaxe and/or sword are cut out, you need to cut out the other paper copy. (I had my son practice his scissor work while I worked on the previous parts). Spray with adhesive/smear with glue and align on blank side of each piece. Smooth to remove any wrinkles.
  6. That’s it. You’re done!

minecraft costume For directions to make the MINECRAFT STEVE HEAD CLICK HERE.

Note: the prices of the Minecraft go up and down. If you don’t make your own, I hope you find a great deal!

If still want to check the “officially licensed”  products, here are some more links to Amazon:


Need a fun Minecraft Christmas craft?
DIY Minecraft Creeper Santa

DIY MINECRAFT Creeper Santa Ornament

Looking for some gifts for one of the little Minecrafter in your life?

Check out this list of awesome Minecraft books—all librarian, parent, and kid approved!

Miecraft books for boys, minecraft gifts, minecraft reviews

How about a Minecraft party or trick-or-treat bag?

Check out this super easy (and cheap!) DIY Creeper bag:

super easy creeper bagSuper Easy & Cheap CREEPER Tric-or-treat bag


Disclosure of Material Connection: Some of the links in the post above are “affiliate links.” This means if you click on the link and purchase the item, I will receive an affiliate commission. Regardless, I only recommend products or services I use personally and believe will add value to my readers. I am disclosing this in accordance with the Federal Trade Commission’s 16 CFR, Part 255: “Guides Concerning the Use of Endorsements and Testimonials in Advertising.”